

Dock Street Parade | Alpena, Michigan
Why record video?
Genealogy is quite popular right now. Here in the United States, a huge melting pot, people want to know where they came from. And luckily it’s a pretty simple process. With genealogy, you carry part of your history in your DNA, so it’s always with you.
Family trees are another way people like to track their information. Many people enjoy creating detailed family trees to trace the names and locations of their ancestors. This information can be traced through public records.
However, what about the story of WHY your ancestors came to be living in the United States. Not HOW. Not WHEN. Not WHERE they came from. But WHY was the decision made? Some people may be lucky to have that recorded somewhere, but for the most part, family legacy stories have no long term storage option, other than occasionally being repeated at Sunday dinners.

My grandparents in my wedding photobooth, 2011.
Legacy stories are a huge part of the foundation of every family.
Family history is best told verbally from generation to generation.
This picture is of my grandparents in our wedding photo booth. Shortly before this picture was taken, my grandfather had had a series of strokes. It really slowed him down, and so shortly after this picture was taken, we went to visit with our camera, and asked both of my grandparents to tell us about their childhoods.
Anyone who knew my grandpa in his prime knows that he was a storyteller. Our whole family knew a lot of his stories by heart, but I wanted to make sure to capture them for me, my family, and for future generations. As for my grandma, because my grandpa normally did all the story telling, she told us stories that even my mom (her daughter) had never heard. It was a pretty emotional conversation, and I’m so glad that we were able to record them.
My grandpa is still kicking at 90 years old, but he’s not much of a storyteller anymore. I’m so glad that I had the foresight nine years ago to record those stories while I still had the chance.
I did not plan as well for my paternal grandmother. I attempted to record her stories just recently and realized that I should have asked her probably three years ago. Regardless, having that interview with her, no matter if all she remembered was how much she loved dancing (I definitely take after her!), I’m just glad I will have a filmed memory of her.

The “best camera” is the camera you already have.
Step 1: The Camera
The most important thing to remember is that it’s not about the camera. It’s about the story. The “best camera” to use for this, is the camera you already have access to. There are many great options that you probably already have laying around the house.
GOOD OPTIONS:
iPhone*
Android*
iPad*
Tablet with a camera*
GoPro
Webcam + Computer
Photo camera with video capabilities
*Check storage space before recording. You don’t want to run out of space mid-story. I recorded my grandma for 50 minutes at 1920x1080, and the file is 6.2GB.
Grab whatever camera you choose, and set it up on a tripod, or somewhere very steady. Don’t try to hold it. You want your focus to be on the subject, not on making sure the subject is still in-frame. I bought this little tripod (to the right) on Amazon and I’m in love with it. It’s super light weight yet durable. It comes with a standard mount for a point and shoot camera, a mount for a GoPro, as well as a mount for a phone. It ALSO comes with a bluetooth remote for both Android as well as iPhone. And if that’s not enough, the tripod head is a small ball head, so you can adjust for angle. It’s the perfect height for setting it on a table top between you and your subject as you had a cup of coffee together.
Pro-tip: Record and then stop in between stories if you can. This eliminates the possibility of you losing the whole interview if you run out of battery or storage space by the time you get to the end of the interview.

Viewers can forgive poorly exposed images much easier than poorly recorded sound.
step 2: Audio
Years ago, I heard the saying, “51% of any film is the sound”. I don’t remember who said it, or if it’s even the actual word-for-word quote, but it stuck with me. People are much more forgiving of a murky, grainy, even slightly out of focus picture than of audio that is recorded way too loud, or too quiet, or there is an annoying sound in the background. That being said, recording audio has been the bane of my filmmaking career. When our team goes out to record an interview, we record with no less than three microphones for any one interview. And inevitably, one of them always fails. I don’t know why (if I did we wouldn’t need three microphones), but I do know how to put failsafes in place. Now, I’m not saying you need to be recording with more than one microphone, I’m just saying to be mindful of the audio quality as you record what might be a one time opportunity.
There is a big difference between the audio quality from the internal microphone in your smartphone, versus the audio quality of even an inexpensive lavalier microphone. Here are two samples:
With the internal iPhone microphone, the audio is clear but sounds distant. It is much more likely to pick up sounds that are also in proximity to where the camera is set up.
With the attached lavalier microphone, you can hear that the audio sounds much closer to the video, and much more crisp. The lavalier is focused on recording the nearest sound, which is your subject.
Microphones are certainly one product that you get what you pay for. This particular lavalier though was fairly inexpensive, and a clear step-up from just using the internal microphone. The cable on this mic is 6 feet long, so you are able to set the camera up a fairly good distance from your interviewee, and still get good audio. Camera set up plays heavily into interviewing what is lovingly referred to as “hand talkers”. Many people use their hands to convey emphasis on their words. Do not ignore this. Cutting out a hand-talkers hands is like cutting off part of their voice. Plan accordingly!
Audio recording tips:
Be mindful of heaters, AC, fans, deep freezers and open windows
Mic placement is important (Not too close to mouth, avoid contact with clothes)
Record a test minute before starting your interview. Play it back and listen.
step 3: lighting
Video quality and audio quality are very important, but lighting is what takes your video from fine, to great. Most lower quality video recording devices are not capable of recording well in low light. Luckily, with a little forethought, it is not difficult nor expensive to set up a video with great lighting. The following are my preferences, in order:

Natural lighting (plus my pup, Leo. He could have been a model.)
1. Natural lighting. Utilize the sunlight as it comes through a window. Have your interviewee sit with their shoulder to the window, so that the light hits the side of their face. Tip: Make sure the sun beams are not hitting your subject directly.

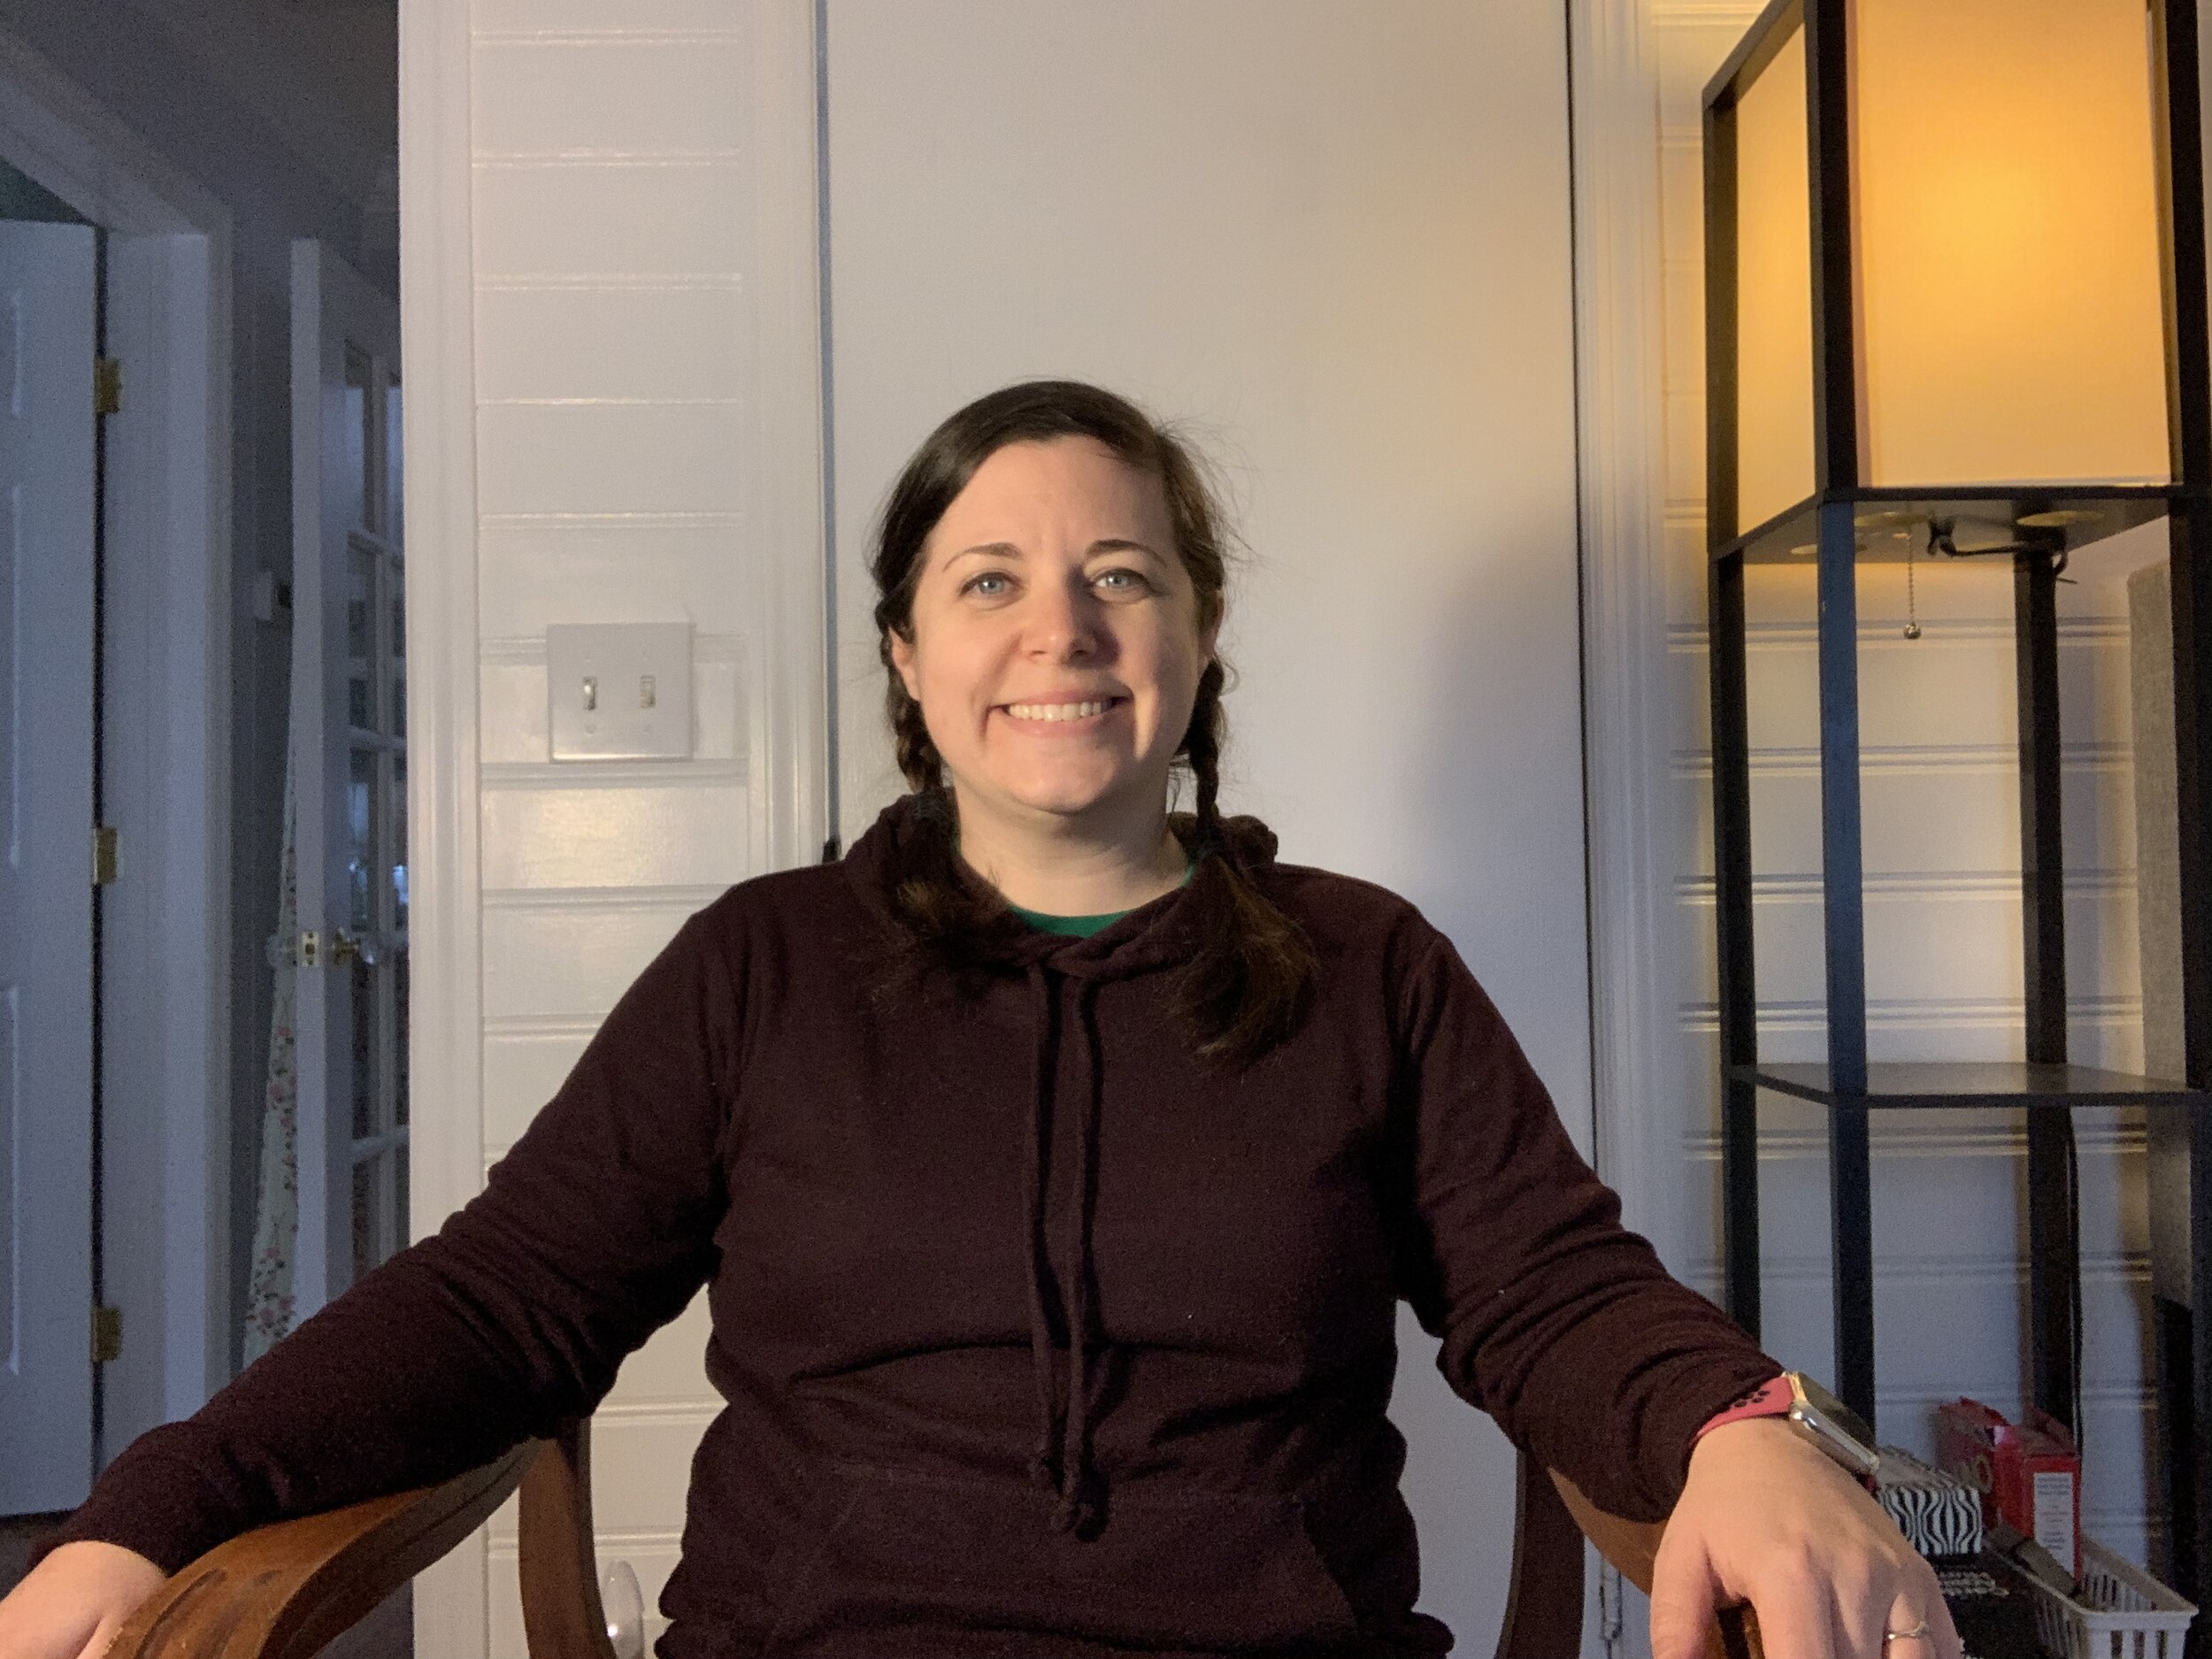
Natural lighting plus a second source
2. Natural lighting, plus a lamp or an additional light source. Place your subject with their shoulder to one light source, and place the second light source near the other shoulder slightly above eye level.
Two source artificial lighting
3. Artificial lighting. Make sure you have a little light coming from both sides, and pull the interviewee slightly away from the background to give the shot more depth.
STRONGLY AVOID fluorescent lights, under any circumstances.

Do not do this.
Also do not backlight your interviewee. See the above picture.
Easy lighting solutions:
The work light with attached clamp. Every filmmakers first lighting source. Easy to use, very affordable. Clamps to anything. You probably even know someone you could borrow one from, if you don’t already own one. Amazon, Home Depot, Walmart, really anywhere that sells home improvement supplies will have you covered.
Tip: to create a softer look, take a piece of tracing paper, and two clothespins, and clip the paper in front of the light. Total cost, under $10.
Selfie light. If you are recording your own stories, and need to keep things simple, consider a selfie light. It clamps to your phone, right around your camera and illuminates your face evenly. If you have your interviewee set up fairly close to the camera, you can use as a non-selfie light as well. I have the light pictured to the right and it’s really nice because it has three different light levels. It’s battery operated and rechargeable but be careful because it only lasts a little over two hours before needing a recharge.
LED Light Panels. These light panels are a little higher end and would be a great investment if you think you will be filming often, and particularly in places where light options might be a bit trickier. These are battery powered, very portable, and you can create even light around your interviewee since there are three lights included.

interview techniques
If you take away any tip from this blog, take this: Don’t interview. Have a conversation. You may have a list of questions or stories that you want your loved one to recount, but let them talk. Interrupt as little as possible, and steer the conversation when absolutely necessary, but overall just let them talk. You have no idea what they will include if you just let them continue on.
My last tip is to avoid saying things like, “Did you drive a 1920’s Ford?” Instead say, “Tell me about the first car you ever owned.” Don’t give any opportunities for one word answers. Initiate a conversation, and just let the camera roll.
Storage solutions
I’m not going to go into too much detail about storage options, since that could be it’s own blog post. So many options, so little time. The following is what I would recommend, if you are looking to be on the budget conscious side.
STORAGE + SHARING OPTIONS
Free: Upload to any of these services for free and share the link with your family and friends.
Dropbox Basic (2GB)
Google Drive (15GB)
iCloud (5GB)
YouTube (Unlimited storage + Privacy options so that you can control who is able to see your videos)
Minimal cost: With a flash drive, you can share your videos with your family and friends by letting them plug in a flash drive to their computer and watching the videos however they want. You can get a decent amount of storage for fairly inexpensive nowadays. The link to the left is a pack of five flash drives that all can hold 16GB of storage. As I mentioned in Step 1: Camera, I recorded my grandma on my iPhone XS at 1920x1080 (standard HD) for 50 minutes, and the file came out to 6.2GB. So, if you record an interview for an hour, I would expect it will be over 7GB. Two hours would be 14GB, so a 16GB flash drive would be pretty close to what you would need to share your videos. An hour long interview would be fine on an 8GB flash drive, which should be very inexpensive.
More complicated + Added cost: DVD or Blu-ray creation. Again, I’m not going to go into this because unless you want to go down that deep dark hole of learning video editing and authoring, you would probably want to hire someone to do this for you.

My mom at 3 years old.
To conclude, you will not regret filming your loved ones. You will regret dragging your feet and missing your opportunity. Seize the day. Grab whatever camera you have closest to you and go have a conversation with the people you love the most.
And if you think that you might want to have a professionally filmed “Legacy Film”, you can always contact us and we can discuss ideas and pricing.
Full transparency: The links to Amazon products are Amazon Affiliate links. I get a small percentage if you buy the products through my blog. Thanks for reading and supporting!