
MacBook Air Laptops Have Faulty Hard Drives
Obviously Apple doesn't want to share that with you, but as I was researching how to fix an Early 2014 MacBook Air, I came across quite a few people with the exact same issue---the hard drive crapped out on them. The issue with the particular computer I was working on involved the hard drive not being recognized during start-up. You had to restart it about 12 times before the system would recognize the hard drive and actually start up. It was frustrating to say the least.
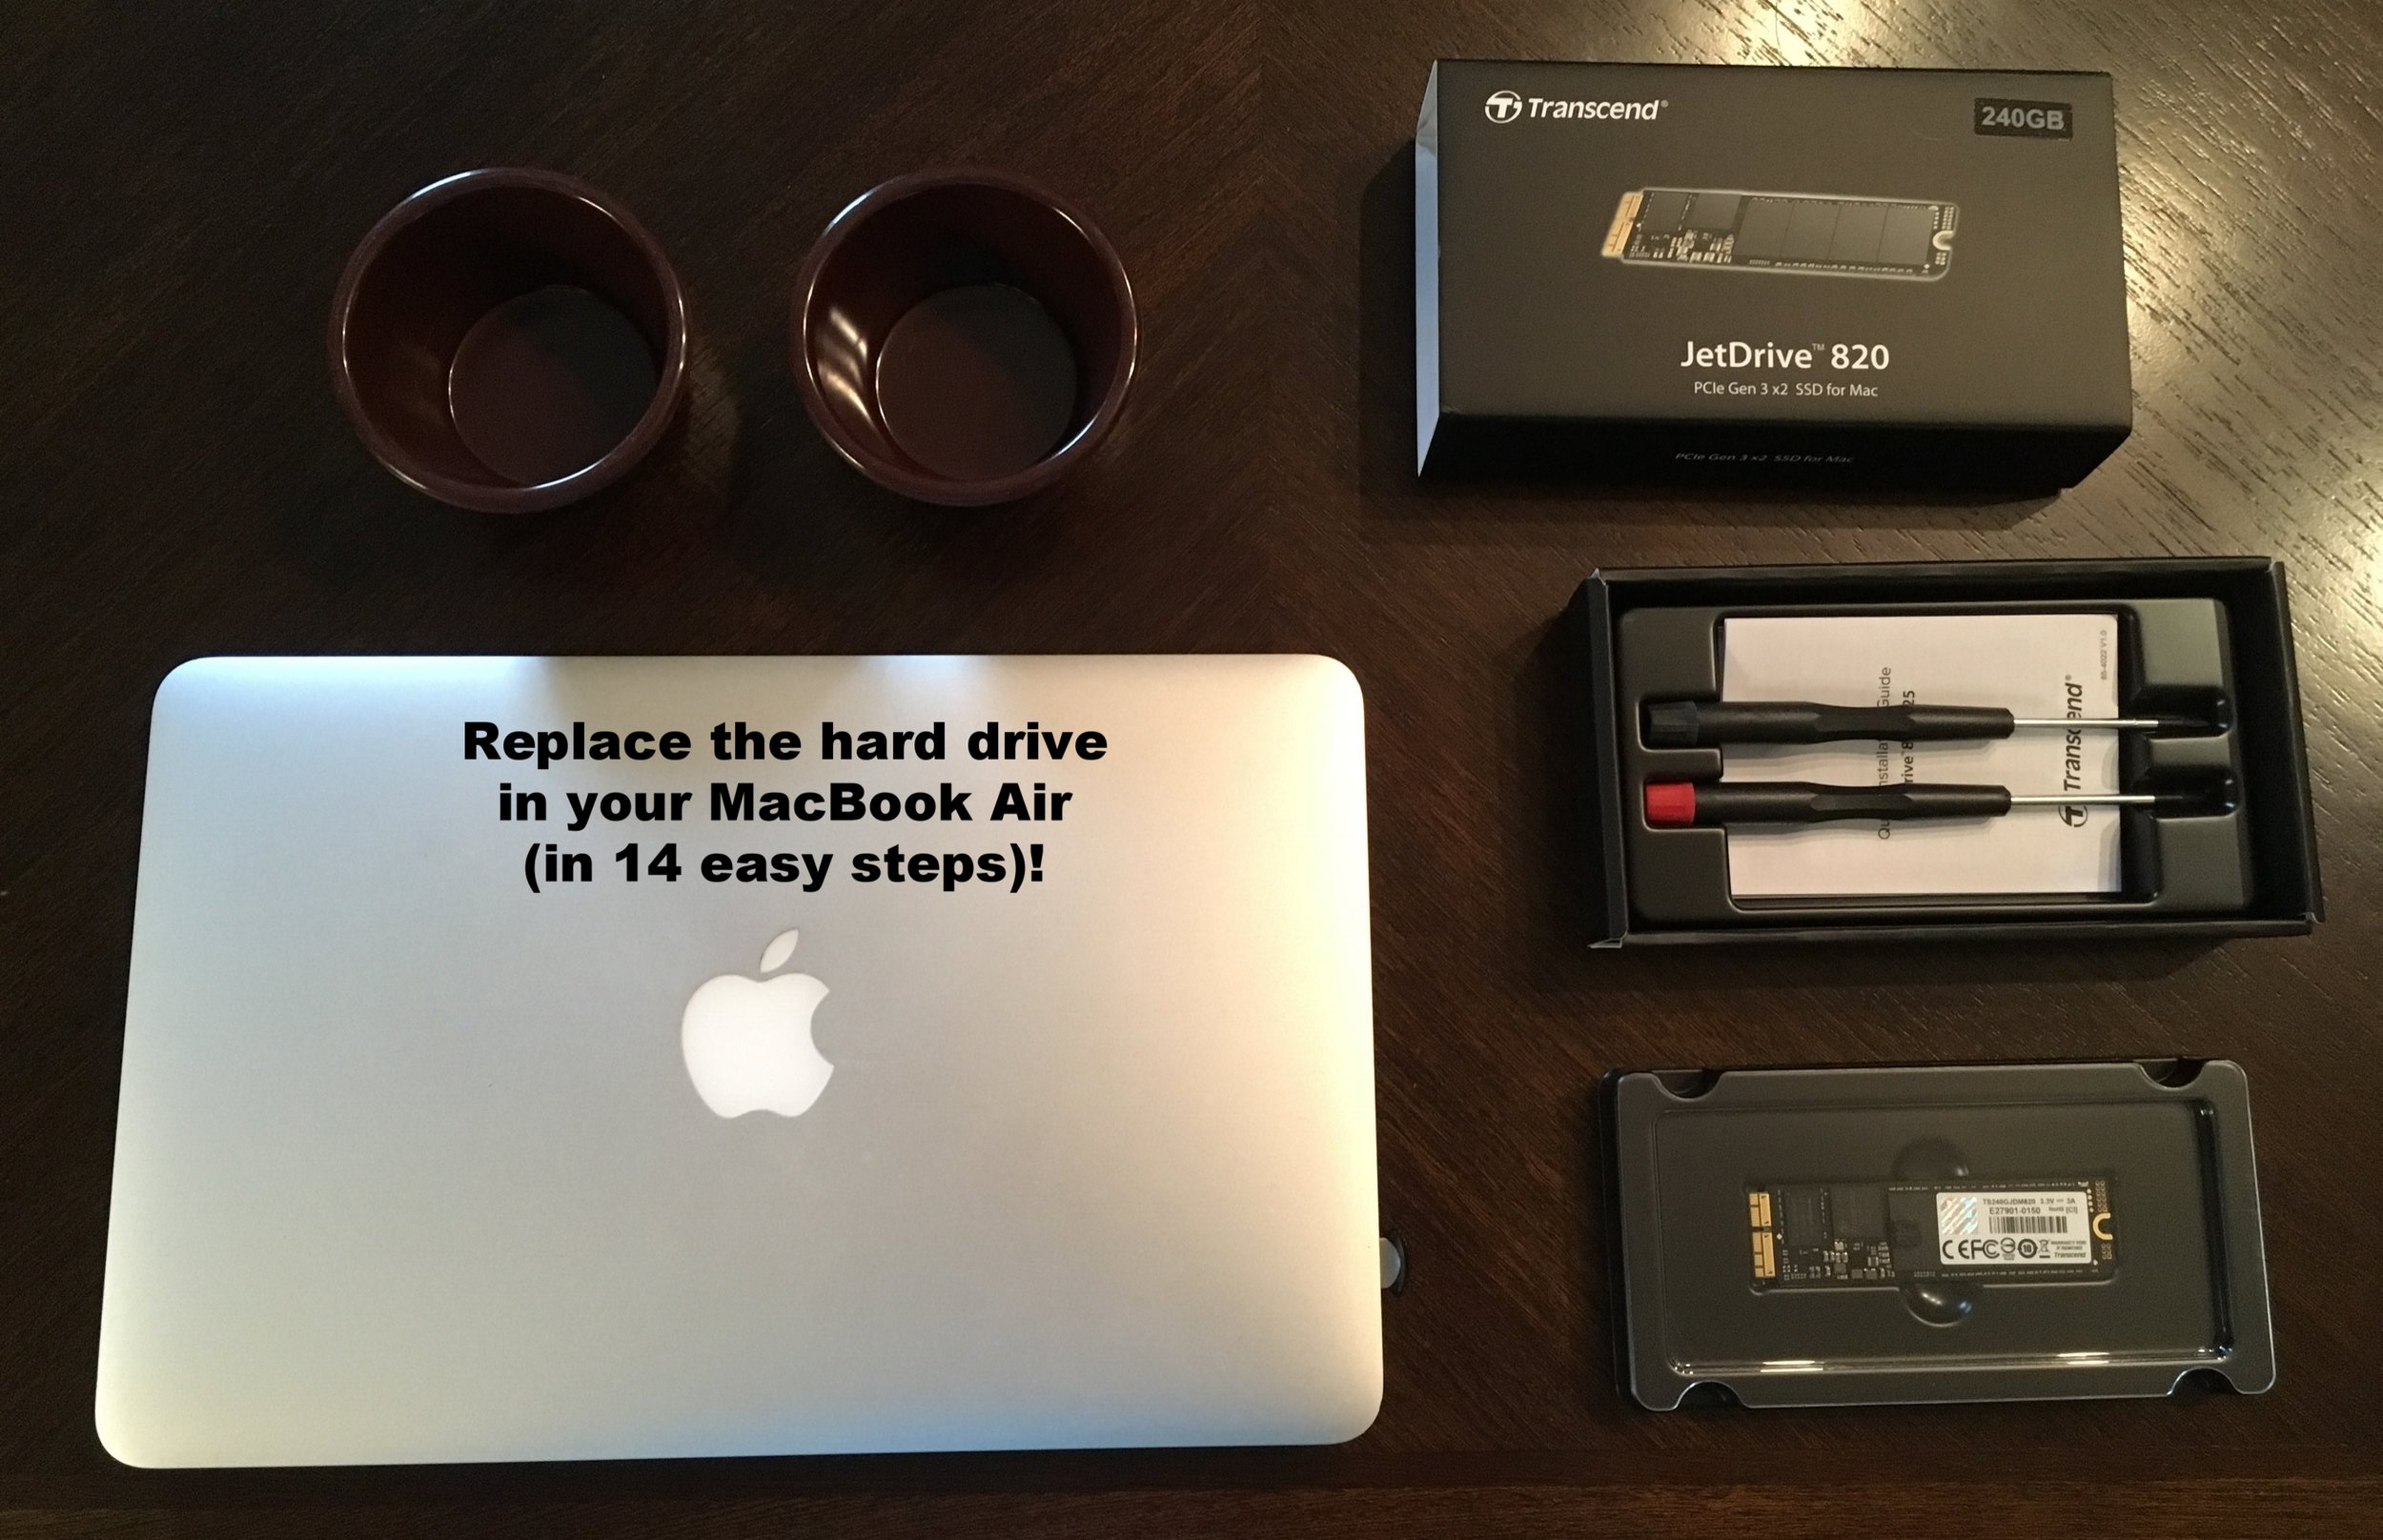
So after getting a quote from the Genius Bar for $350 to replace my 120 GB SSD (or the added opinion to just buy a new MacBook Air for $1,000), I decided to forge ahead on my own. I went to Amazon* and found this guy to the right, which came with the screwdrivers I needed, and was twice the size of the original SSD, so at this point, I was already $150 ahead.
Then it came time to install.
I'm pretty good with technology, and I really love taking things apart and putting them back together, so I was certainly up to the challenge.
I however found very few walkthroughs to follow online to make sure I was doing everything right from the very beginning, to the very end, so I decided to do one for you.
Here you go!
Step 1: Backup your computer
If you haven't already, back up your computer using Apple Time Machine or use Super Duper or whatever your system backup preference might be---the backup world is your oyster.

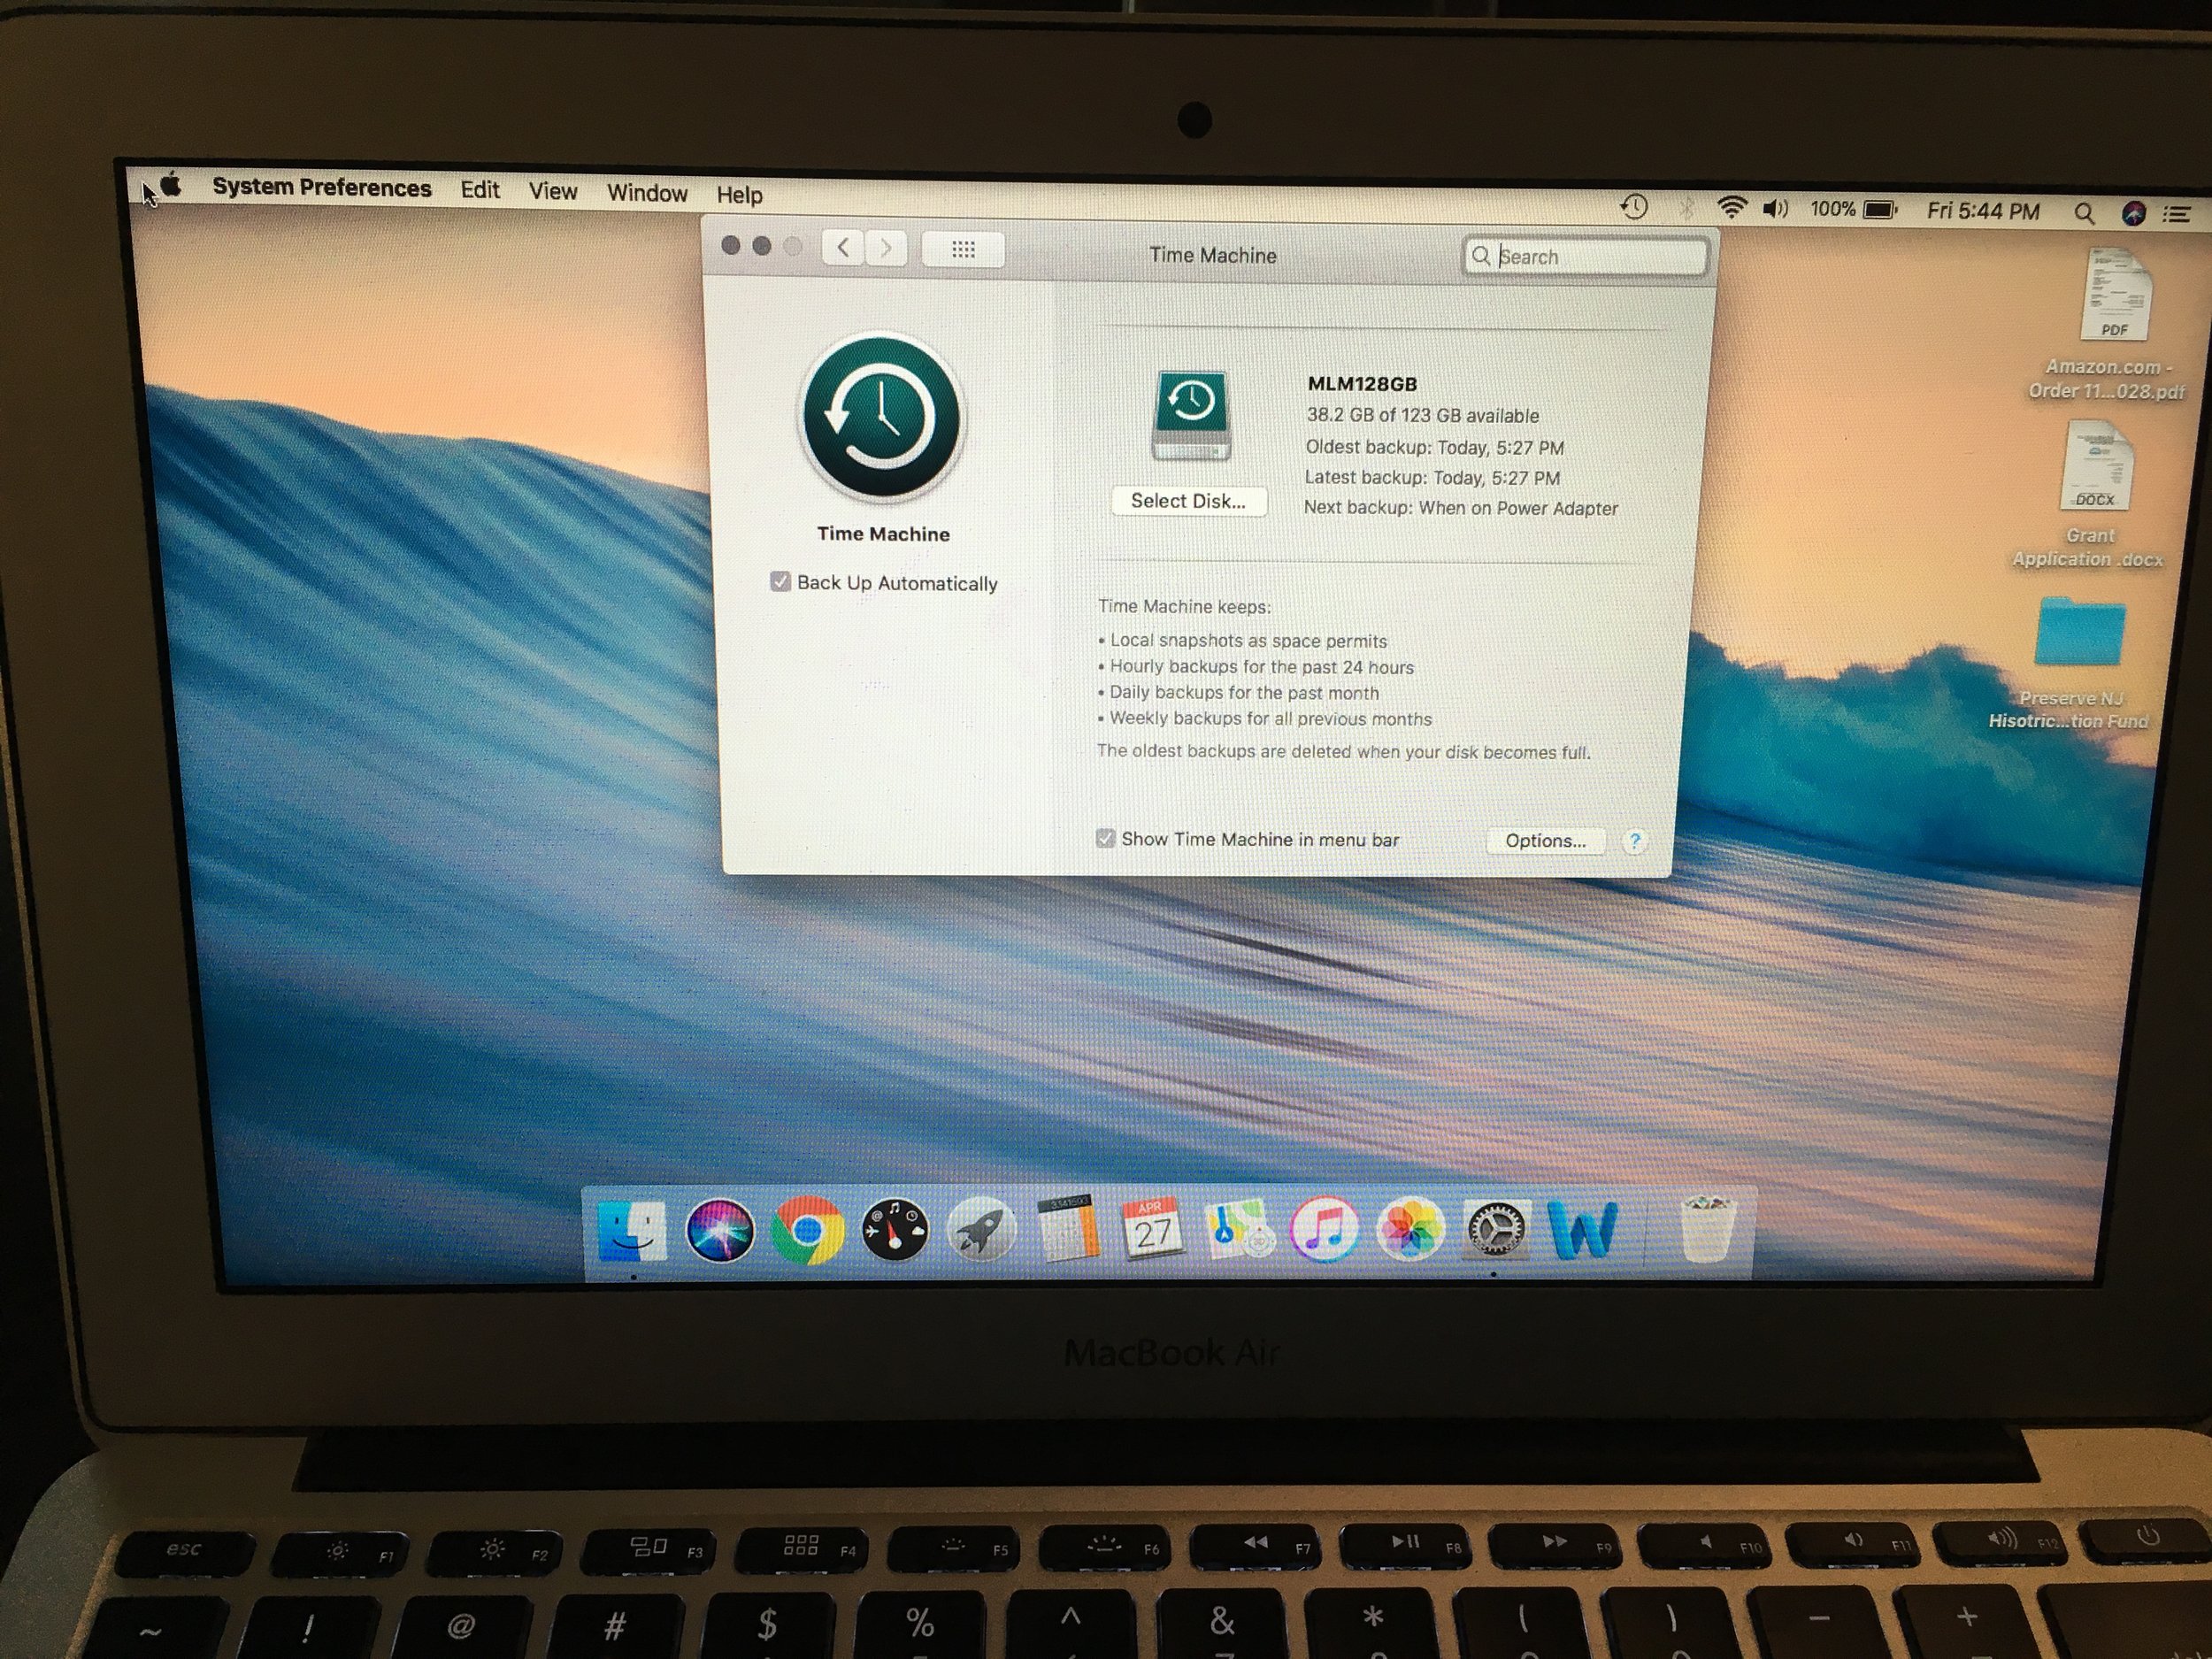
Backup your computer using whatever method you prefer.
Step 2: Power down your computer
I know this goes without saying, but I am being thorough here. Bear with me. Power down your computer. Close the lid. Flip it over.
Step 3: Remove the back of your MacBook Air
Use one of the two provided screwdrivers to take the back off of your computer. Put the screws someplace safe. I usually use a little ramekin bowl that I put soy sauce in for sushi, but again, be your own person. Choose your own screw-saving vessel.
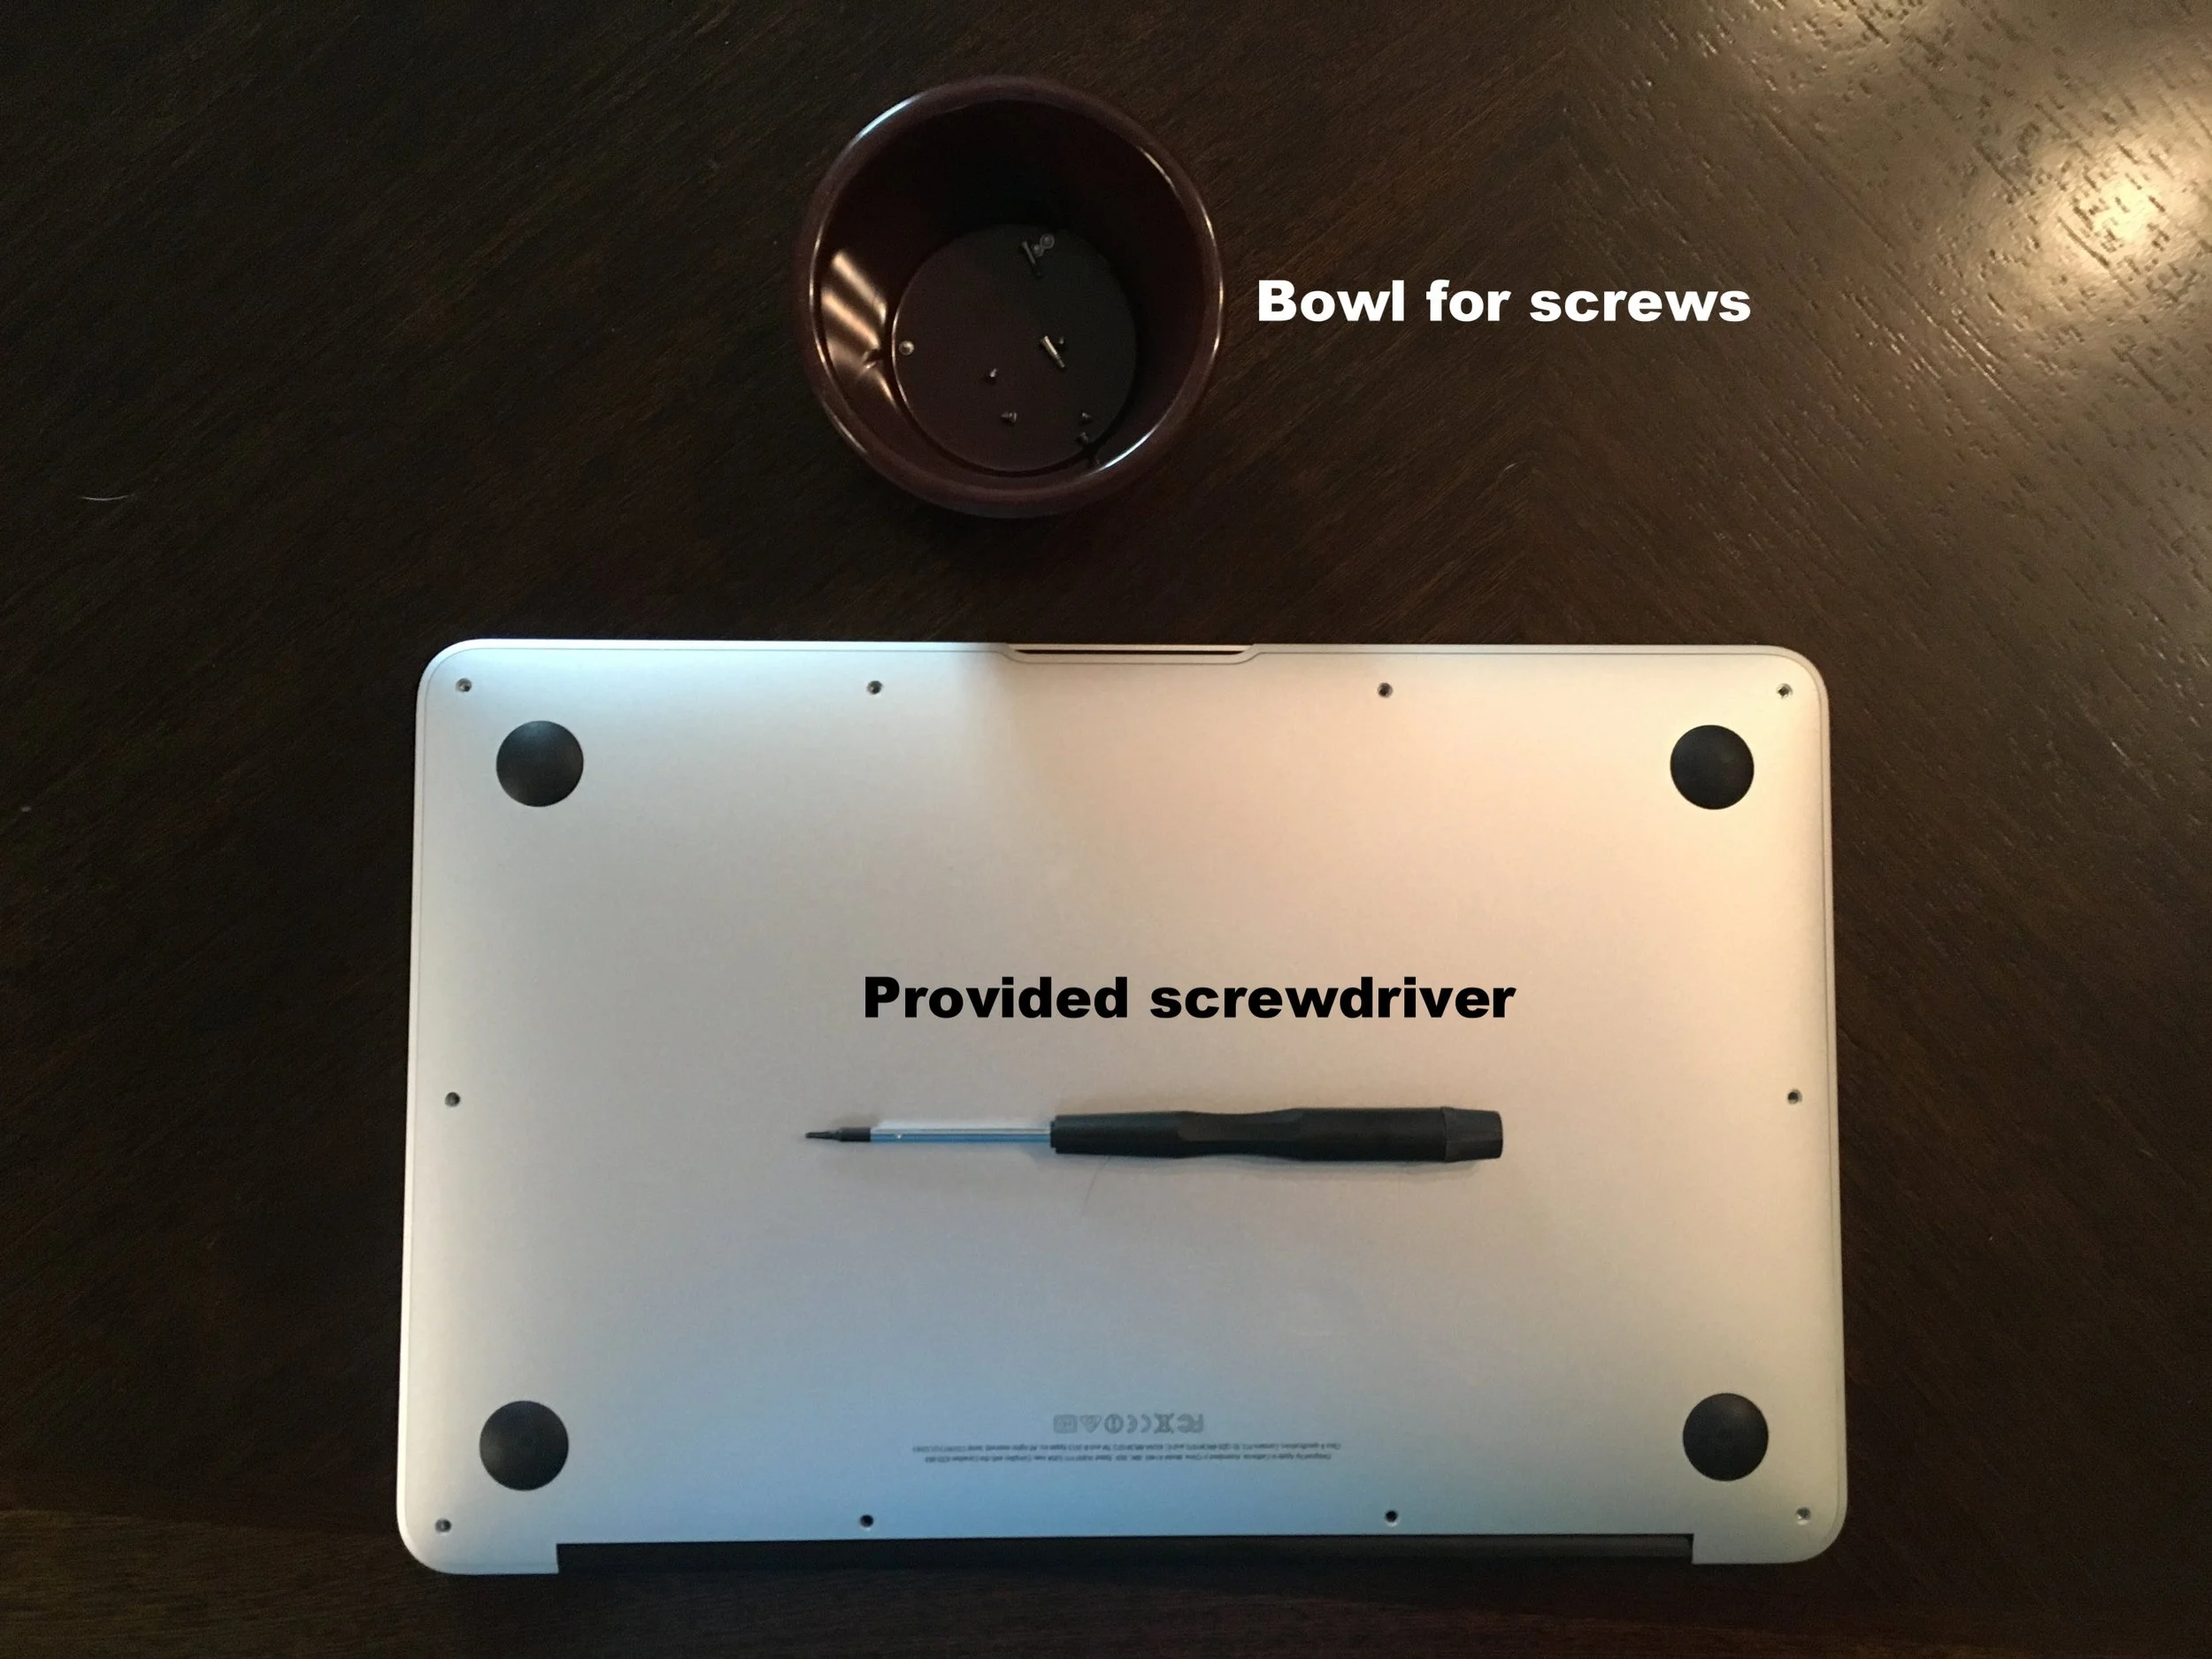
Remove the back of the laptop
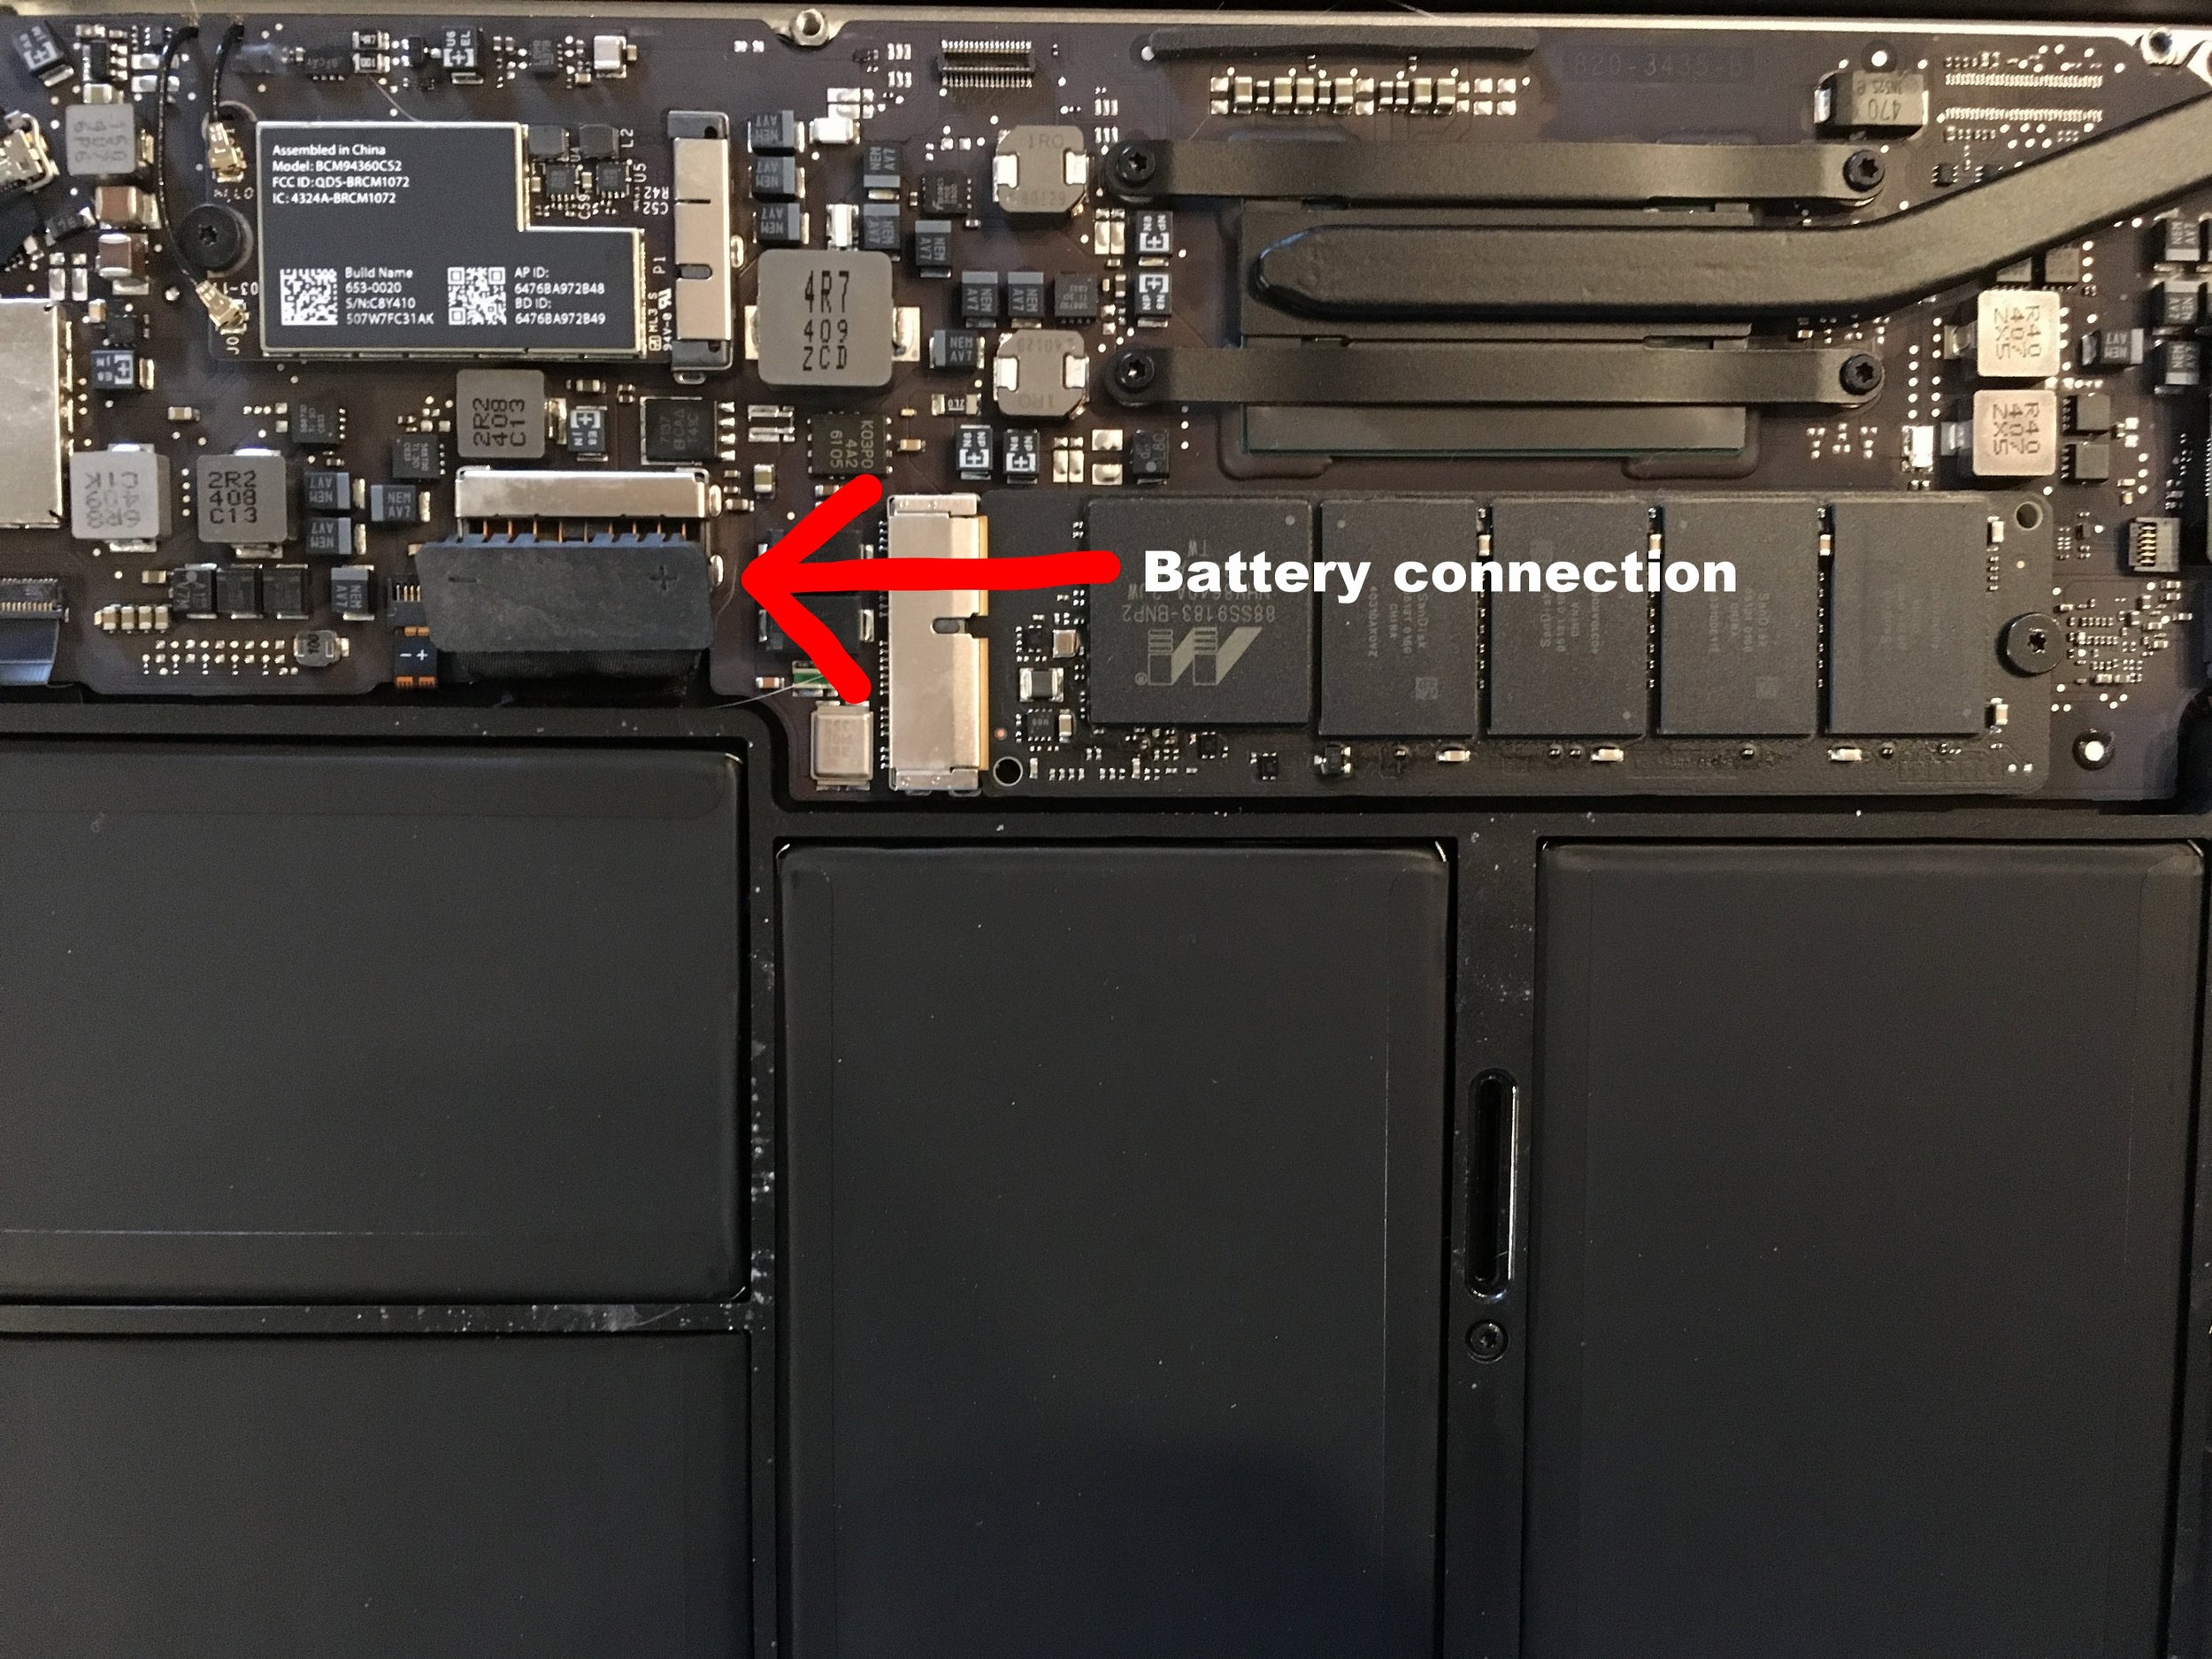
Step 4: Unplug the battery
Find the little black square with the + and - signs on it and using delicate fingers, pop it up so it's no longer connected.
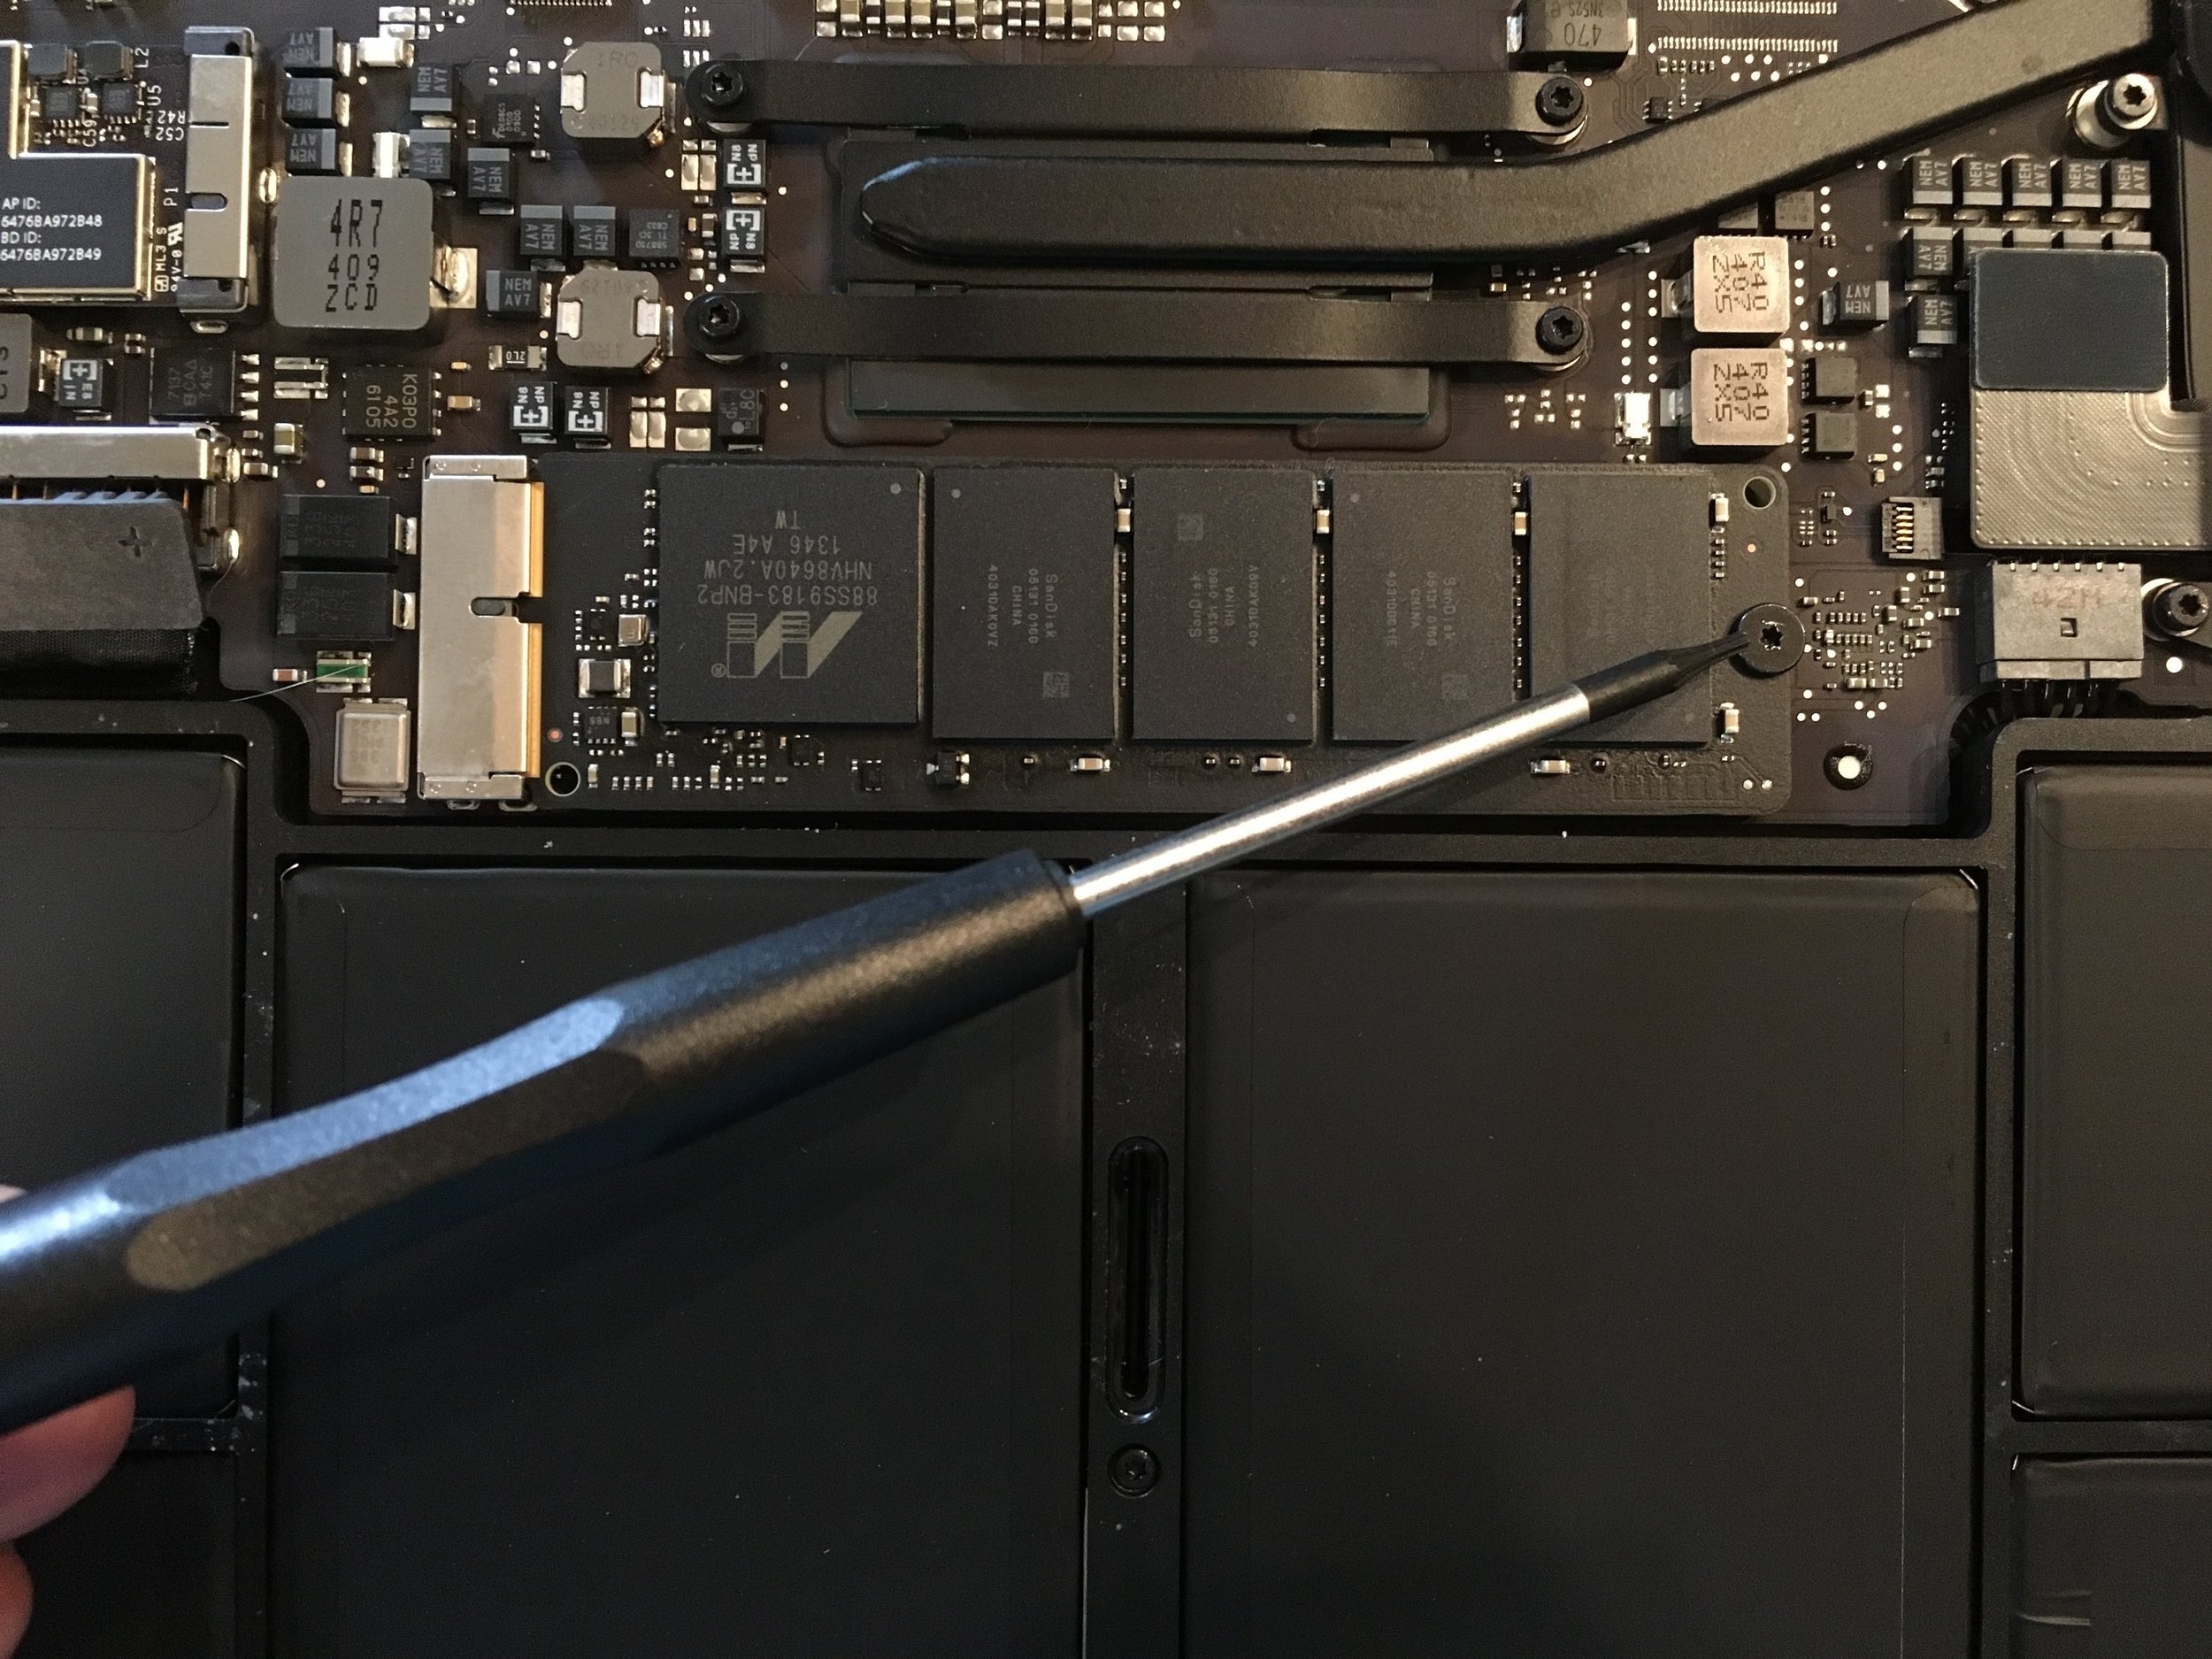
Step 5: Unscrew the anchor screw
There is one screw holding your old SSD in place. Unscrew it, using the other provided screwdriver, and put it someplace safe as well. You could even put it in the same bowl as the other screws, as long as you are paying attention to which one it is. It's bigger than the rest, so it shouldn't be too hard.
Remove the screw holding in the SSD
Step 6: Remove the old SSD
Very gingerly, grasp the old SSD by the sides, lift up just slightly and pull it straight back from the mount. Set it down somewhere safe and clean. You can use the empty box from the new SSD once the new one is installed.
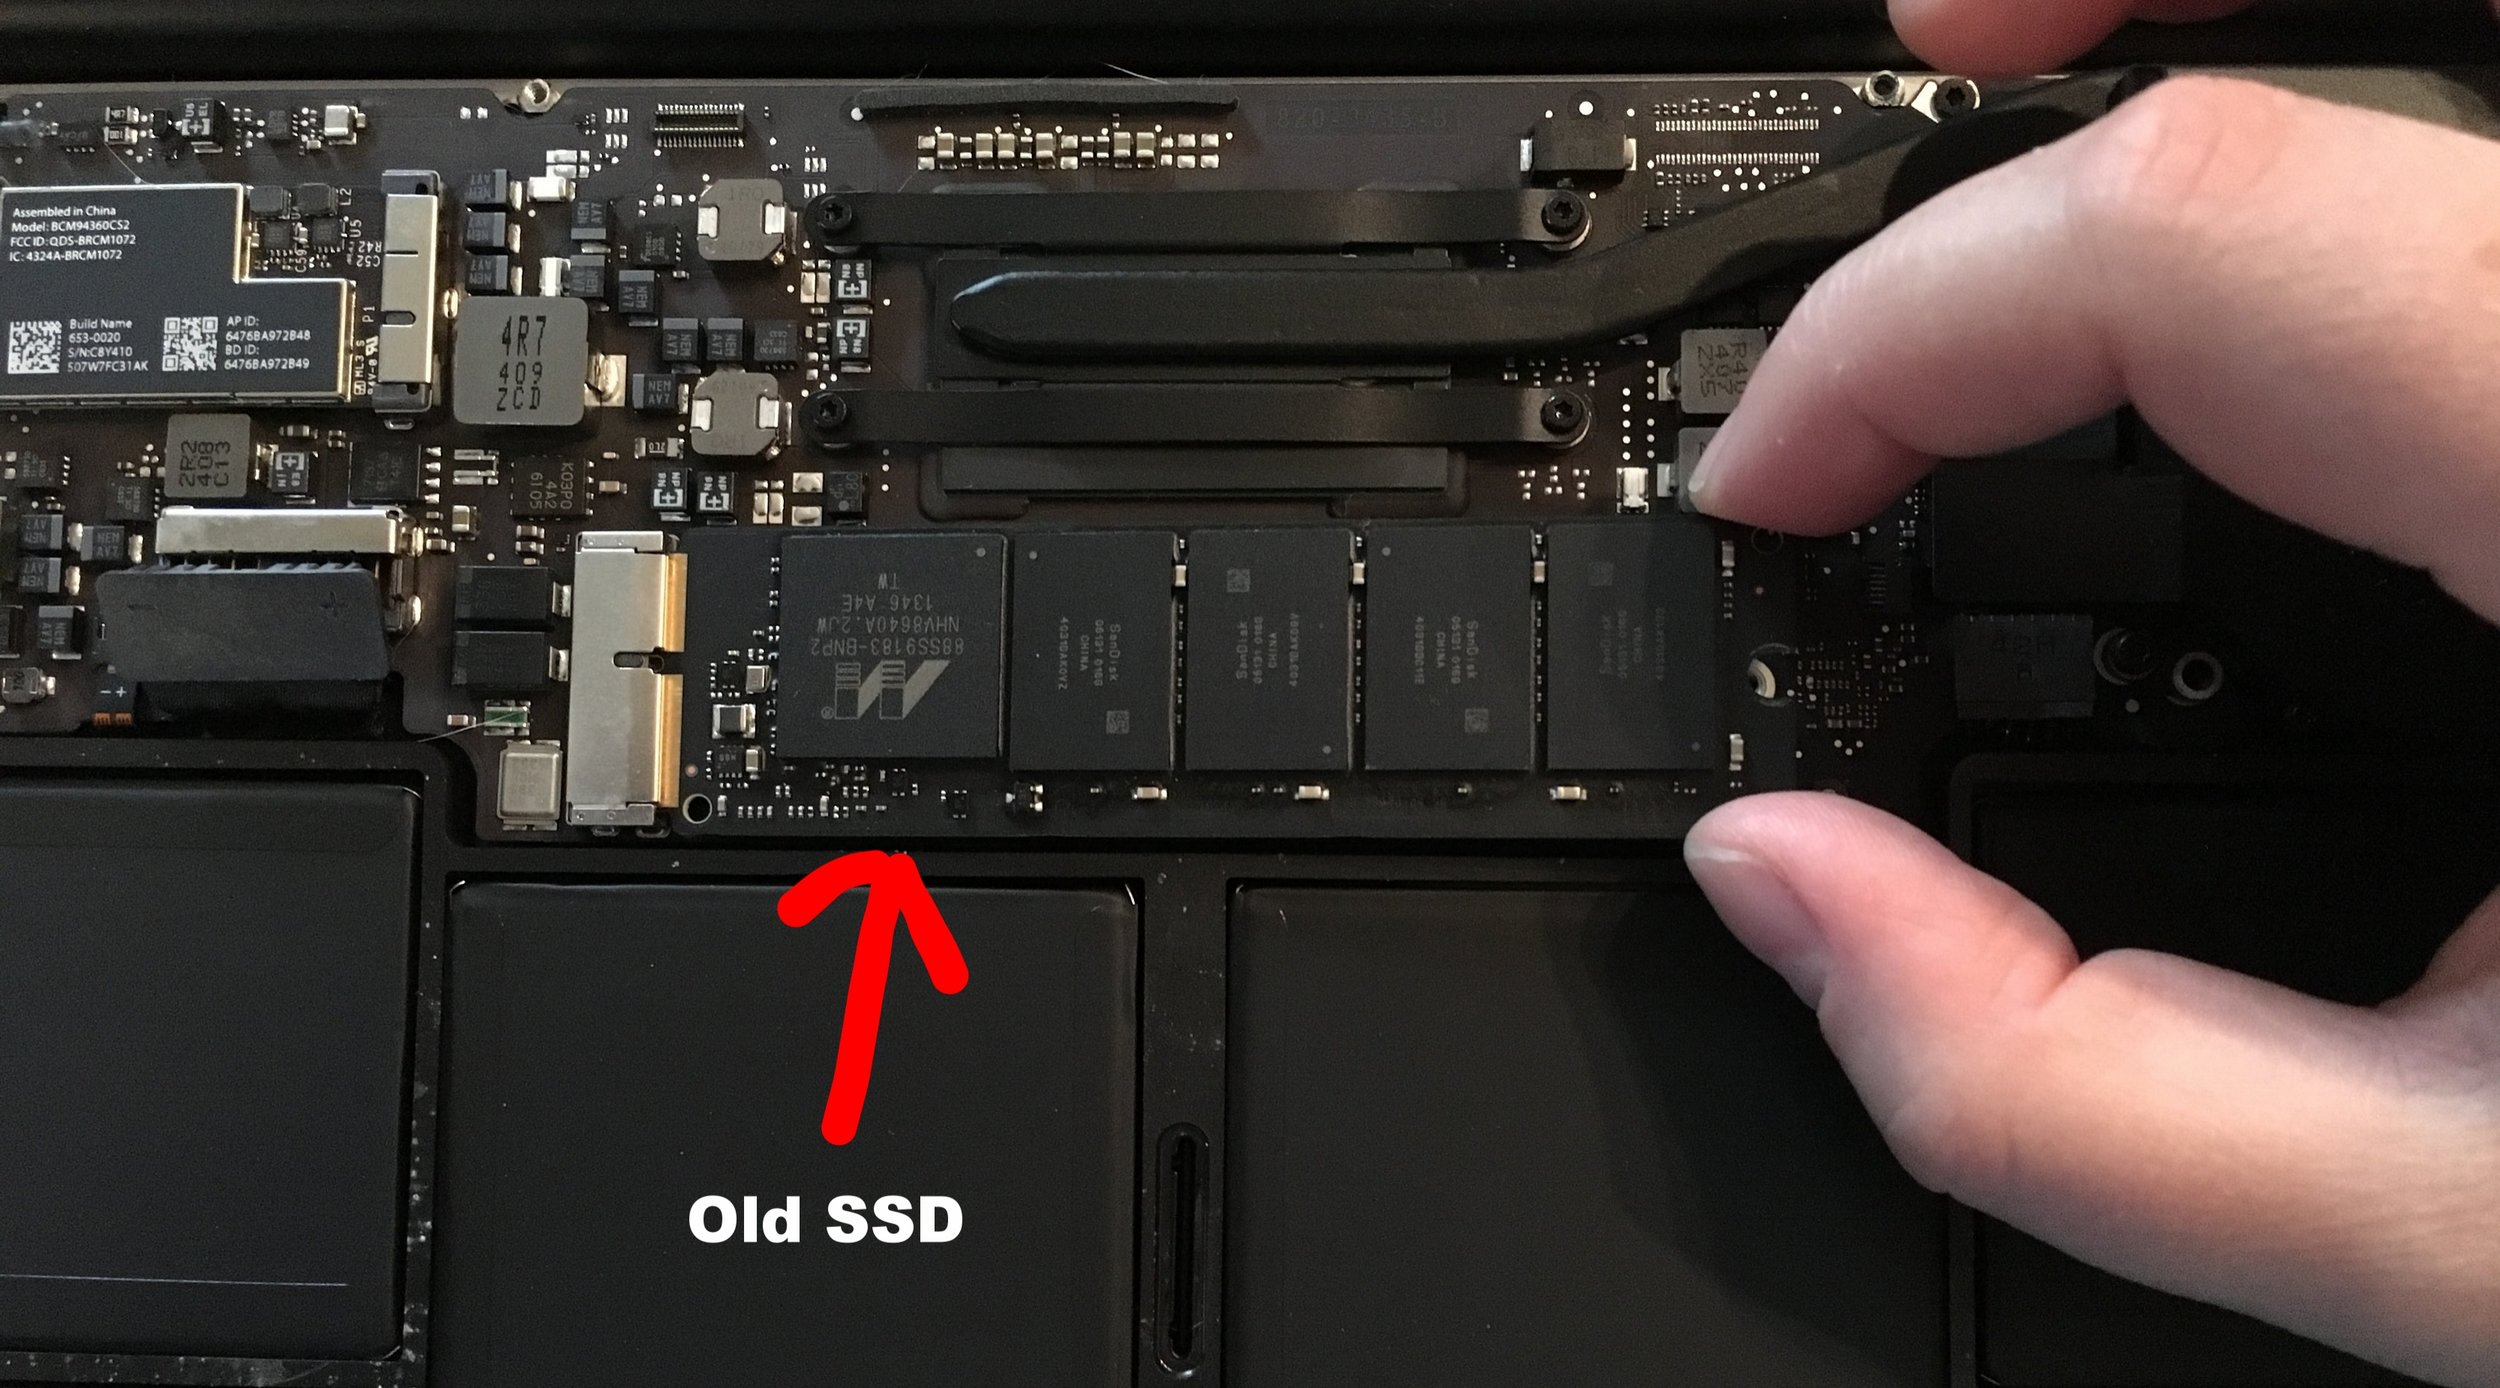
Carefully remove the old SSD
Step 7: Install new SSD into your MacBook Air
Same as above, grab the new SSD by the sides carefully and fit it into the mount. There is a divide in the card, that matches with a divider within the mount. Eyeball that spot first so that you don't end up jamming it in there.
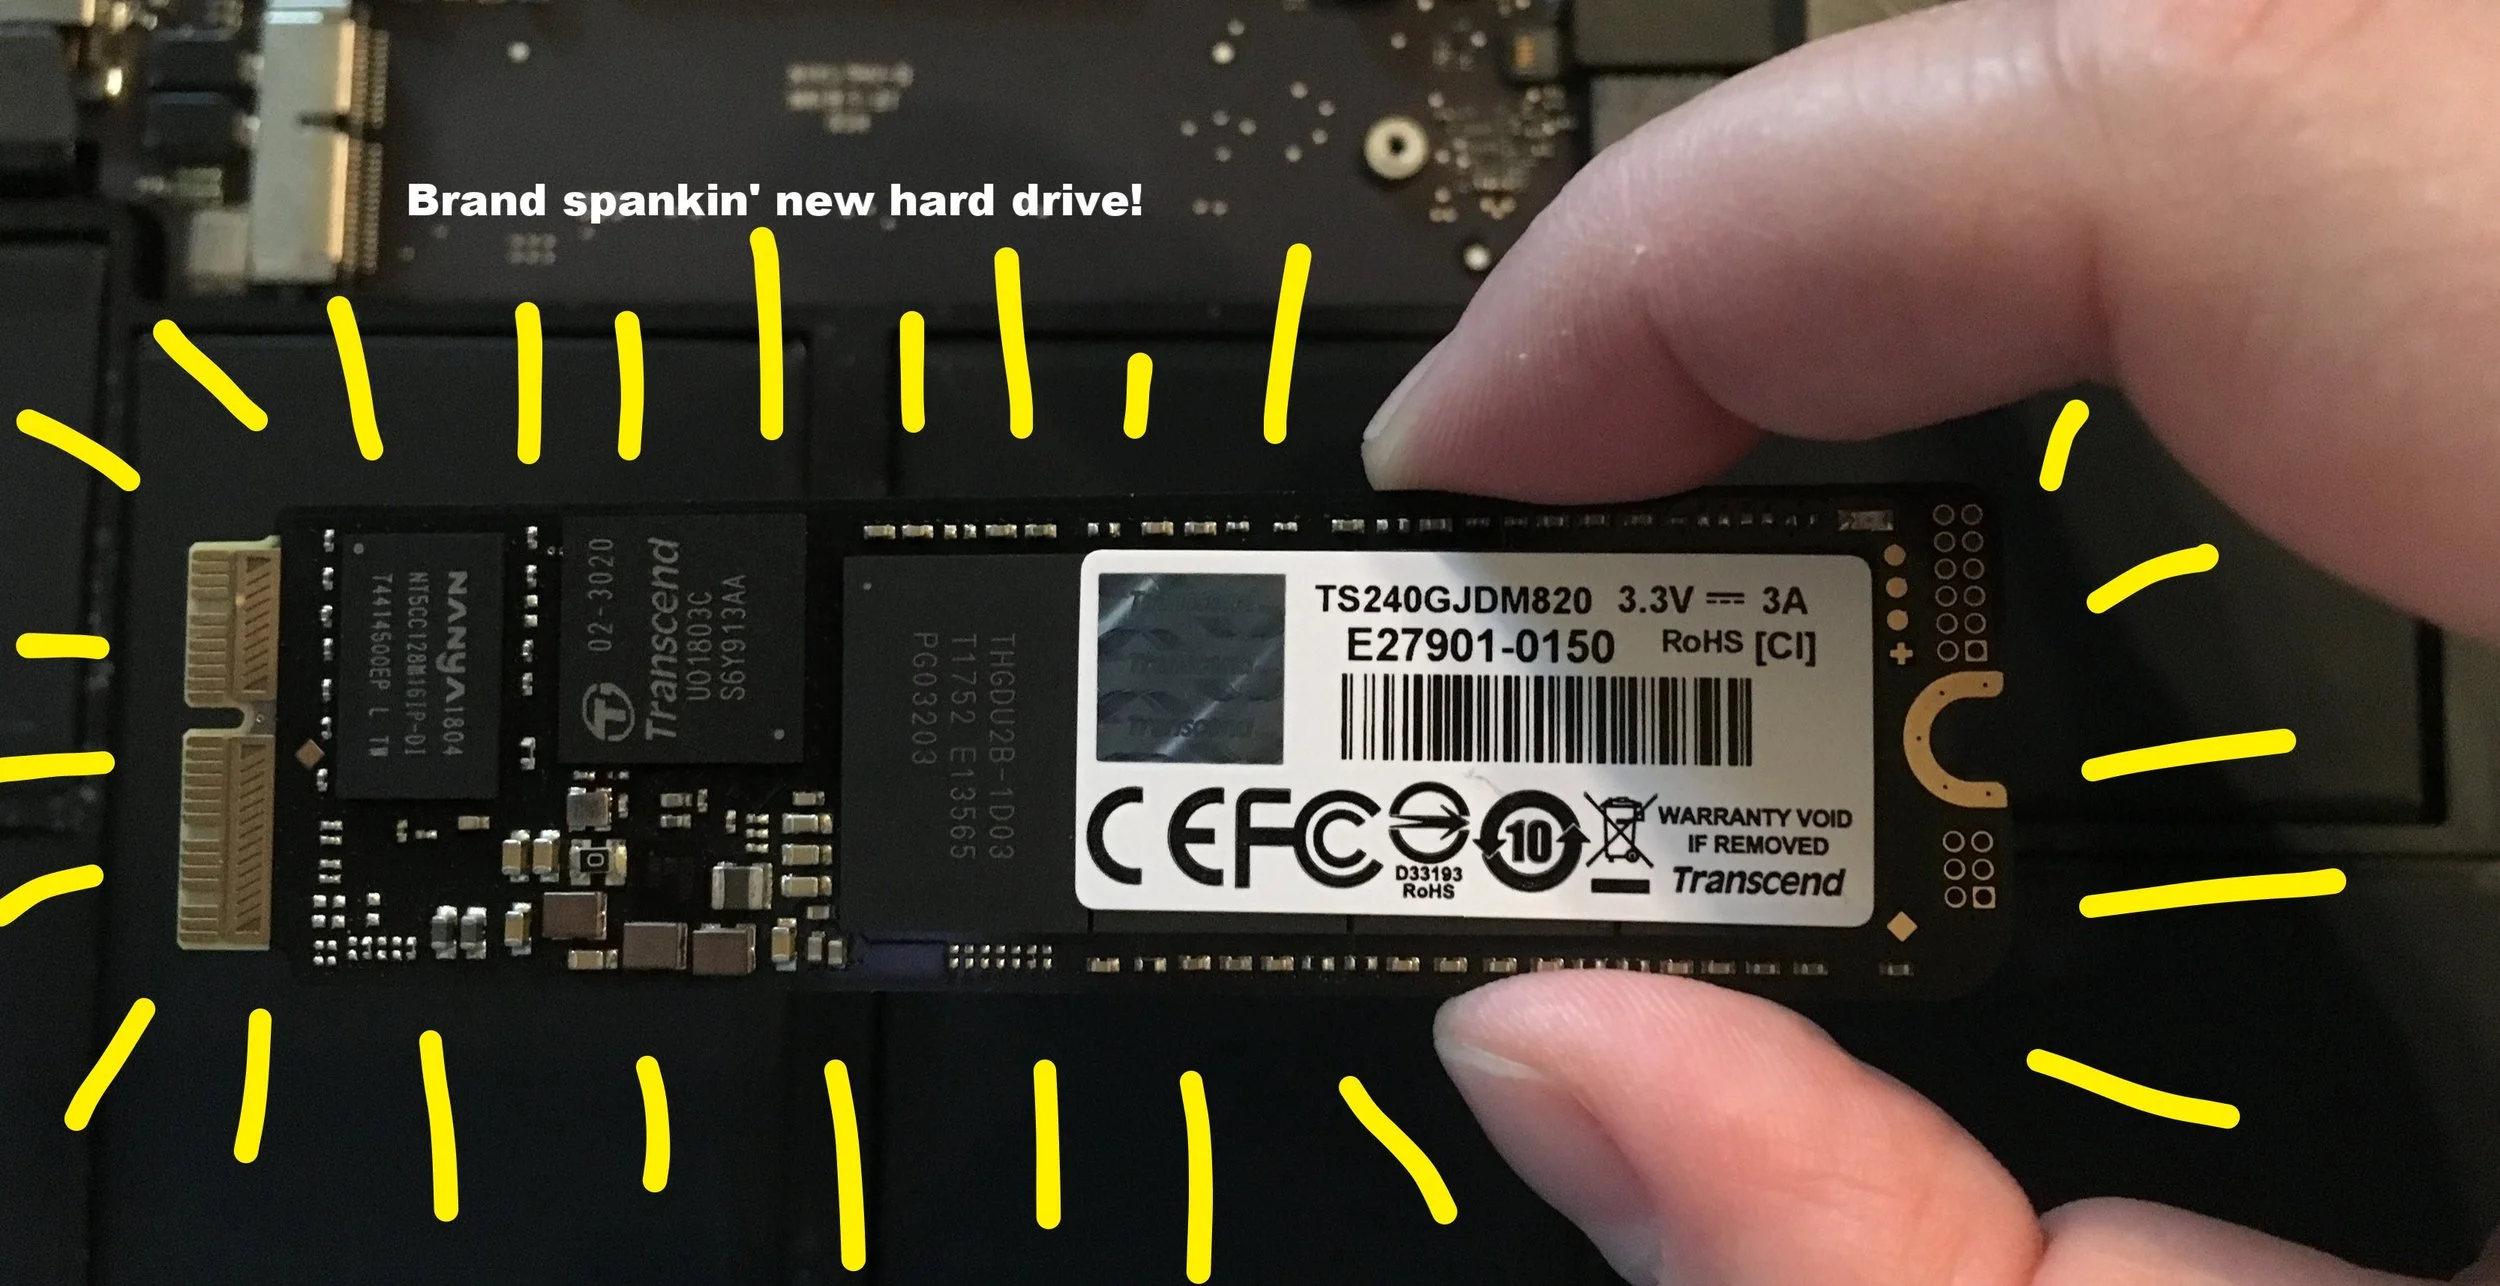
New hard drive!
Step 8: Reattach the anchor screw
Now we're just reversing the last few steps. Find that screw that you just unscrewed and screw it back in. The new card should overlay the threaded hole so that the screw fits in there without issue.

Reattach the screw holding the SSD using the provided screwdriver
Step 9: Reattach the battery
Pop that little +/- piece back into place. You'll know soon enough if you did it right. (Because it won't start up. Duh.)
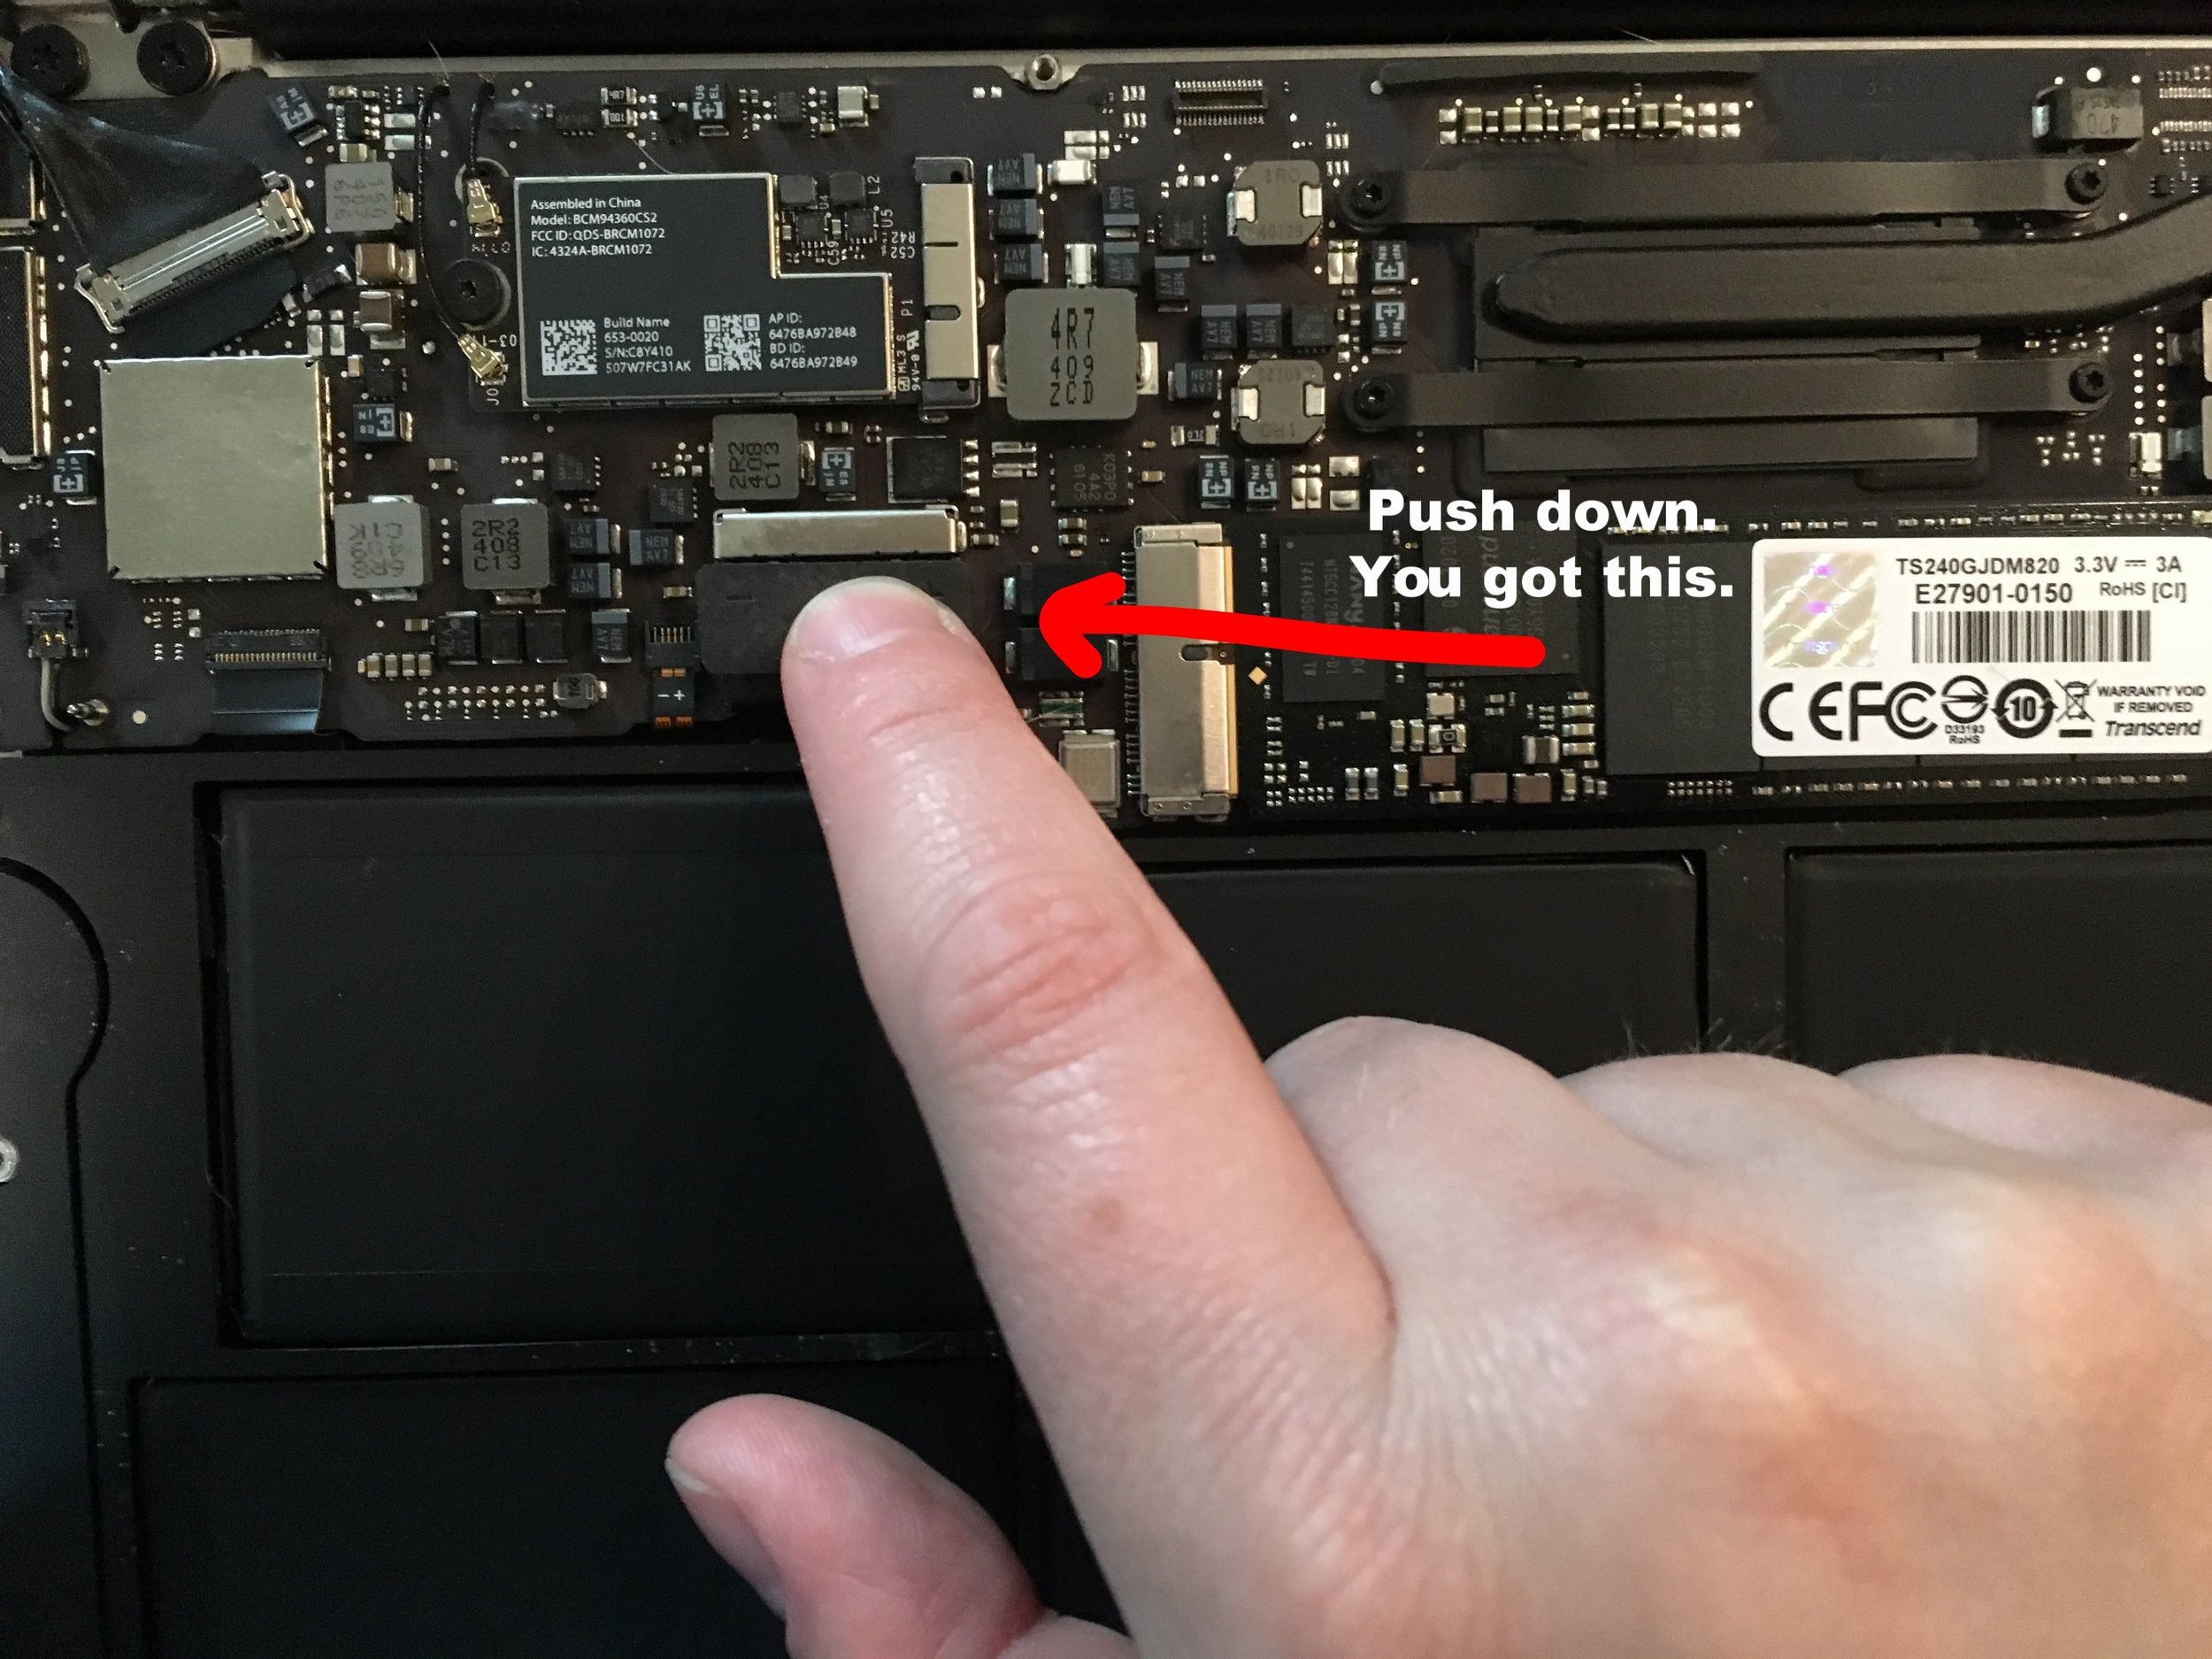
Reattach the MacBook Air battery
Step 10: Reattach the computer back
I typically just screw in the two screws on the hinge side, and one on each of the other sides, just in case I need to open that bad Larry again, and then I don't have to unscrew each tiny little rascal once again. You shouldn't have any issues since you are following my oh-so-thorough walkthrough, but it's your call.

Step 11: Power into Recovery Mode
Don't plug in your system backup just yet. That's what threw me for a loop when I was working on this sans instructions. Instead, power on your laptop, holding CMD+R once you hear the chime.
That will boot it into Recovery mode. This may take a bit as it's trying to do Internet Recovery. Once you see the start-up screen, which give you these options:
Select Disk Utility.

Yes, I had to pull this image from the internet. There is no way you would be installing a new copy of Lion in 2018.
Step 12: Reformat Drive
Now, this drive is labeled as being for Mac specifically, however when I first booted up, I realized that it was still formatted for Windows, so I had to backtrack a bit. I've saving you from this hassle. Once in Disk Utility, select your new drive on the left hand side, and select Erase at the top. From the new window, name your new drive something rad. You'll be looking at that name everyday, so no pressure.
Select Mac OS Extended, Journaled. Then select Erase.

Let Disk Utility do its job, and then get the heck out. Only trouble can be caused from here past this point.
Step 12.5: Install operating system
Depending on when you purchased your MacBook Air, you may have to install the original OS X from Internet Recovery and all subsequent OS X updates until you get to the system your computer was running before you started this whole mission. The computer I was working with had been purchased with Maverick installed, so I had to install that first, then upgrade to High Sierra (what is this, 2018? Why yes, yes it is. (That's a note for all of you stumbling upon this blog in the future, when the OS X is 10.17 Purple Octopus.) Because the internet lives forever.) Basically, unless your computer is brand new, you are going to have to install from Internet Recovery, and continue to upgrade until the OS X is again current.
Step 13: Reinstall Mac OS X system
Once you get back to the Recovery mode window, insert your backup drive. Select Reinstall from Time Machine Backup. Select your drive from the startup options, and follow the instructions. This process could be awhile, depending on how much data you had backed up, so make sure that you have your laptop plugged into power somewhere that you can leave it for several hours at least.

Step 14: Restart
As with any new installation, a nice, clean restart is always recommended. Once you see everything is back up and running, power that beast down, add the remaining screws if you haven't already, and you are good to go!
Done!
Hope this helped! Enjoy your not new but improved MacBook Air!
*Just FYI, as an Amazon Associate I earn from qualifying purchases.